Reviews Setup
In this training you will learn how to set up your Reviews
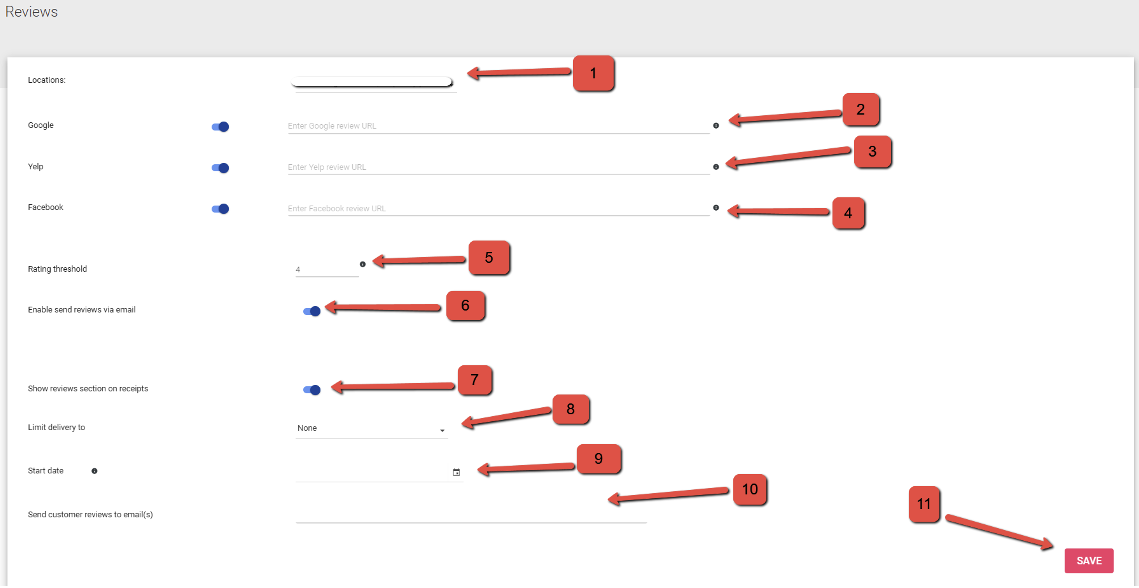
In the back office navigate to Marketing >> Reviews
1. Locations - Allows you to manage manage which of your locations these settings will apply to.
2. Google - This field is for linking to your businesses Google page (You can get this URL from your Google My Business page).
3. Yelp - This field is for linking to your business' Yelp page.
URL - https://www.yelp.com/writeareview/biz/{your business ID}
4. Facebook - This field is for linking to your business' Facebook page.
5. Rating Threshold - Allows you to set the minimum rating that will prompt customers to leave a review on your social media sites.
6. Enable Send Reviews via Email - This toggle will send customer a review link via email.
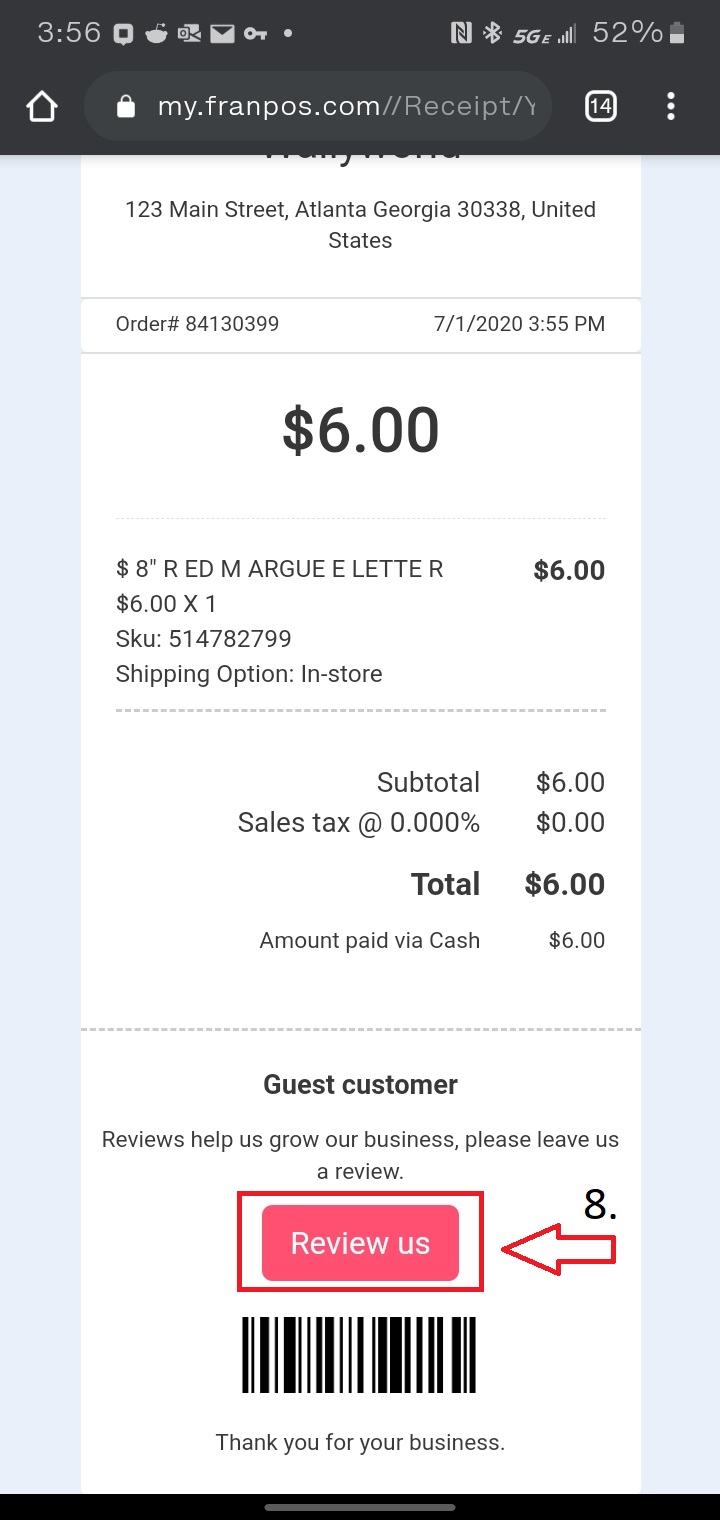
7. Show Reviews Section on Receipt - This toggle will attach a review link to all electronic receipts sent to customers. See image below
8. Limit Delivery to - Limits the number times you will send review links to your customer based on the following configurations: (Reviews are processed for sending the following week/month)
a. None - No limit, and the customer will receive a link to review after every transactionb. N Times per Week per Customer - (Processed the following week) Customer will receive "N" emails, once per day, for purchases made the previous week. i.e. Customer makes 2 purchases the previous week, and you set N to 2, they will receive two emails--once per day on Monday and Tuesday.
c. N Times per Month per Customer - (Processed the following month) Customer will receive "N" emails, once per day, for purchases made the previous month. i.e. Customer makes 2 purchases the previous month, and you set N to 2, they will receive two emails--once per day on the first and second day of the month.Our recommendation is 1 review request per month for optimum results.
9. Start Date - Specifies the first day from which sales will be checked. Leave empty to activate just after save settings.
10. Send Customer Reviews to Email(s) - Allows you to set what email address customer reviews will be emailed to.
Review Section on Receipt
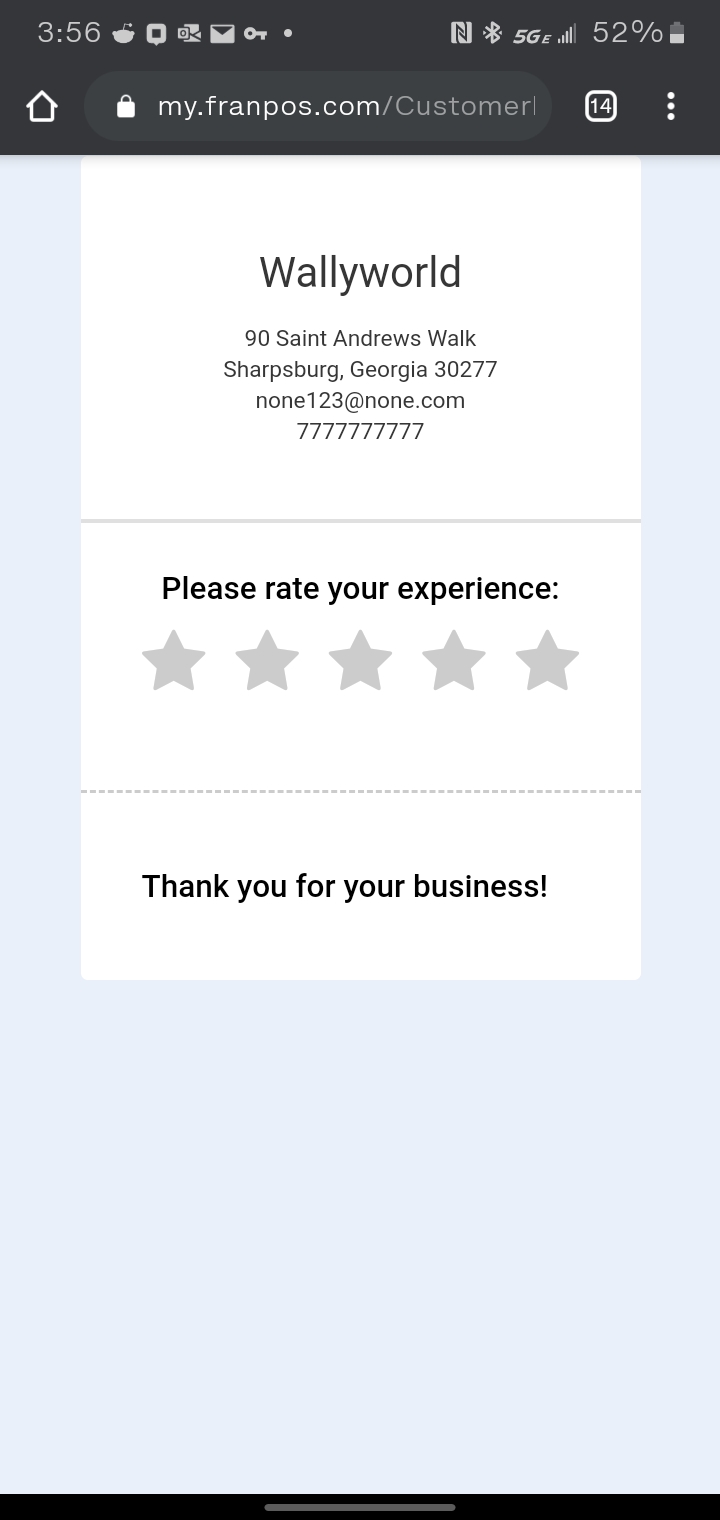
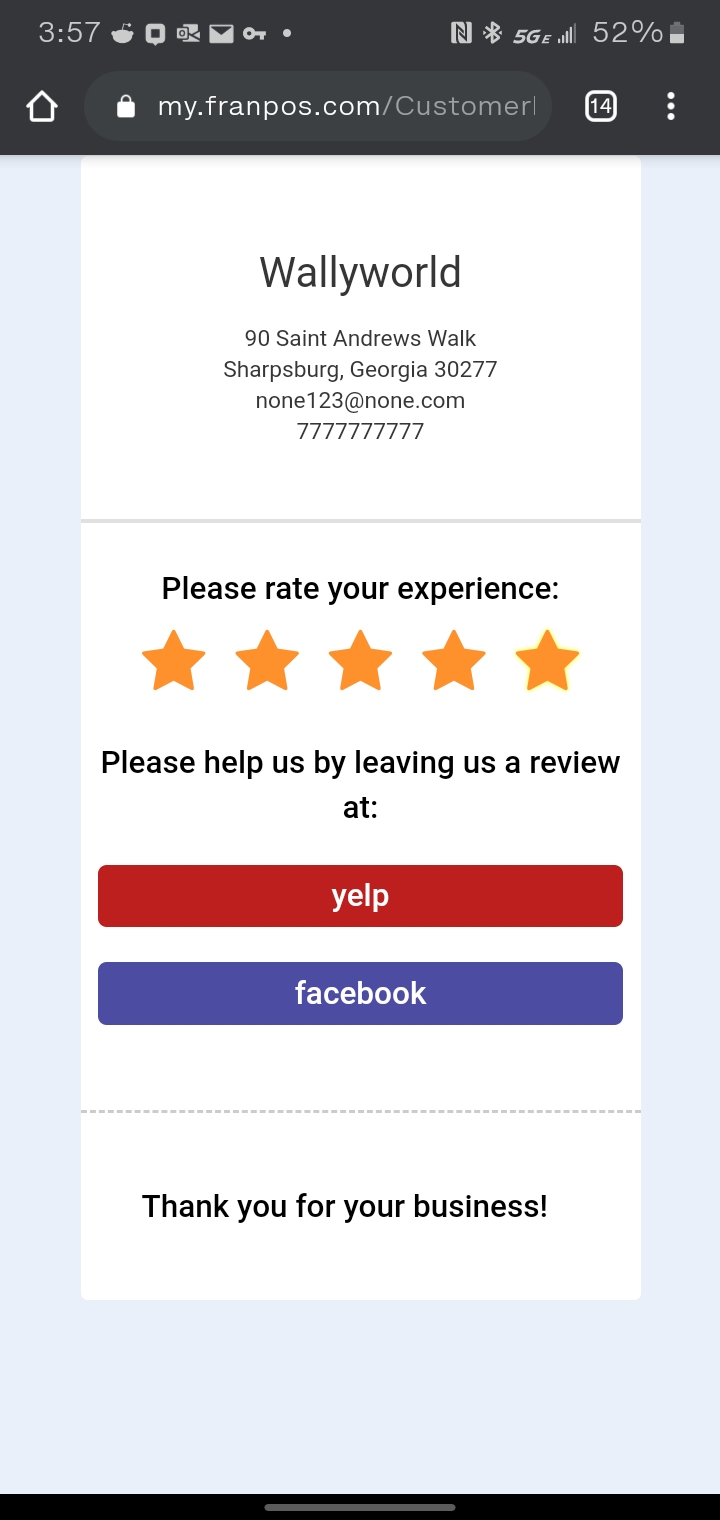
Listed below is an example of the review site that the customer will visit to leave a Review.
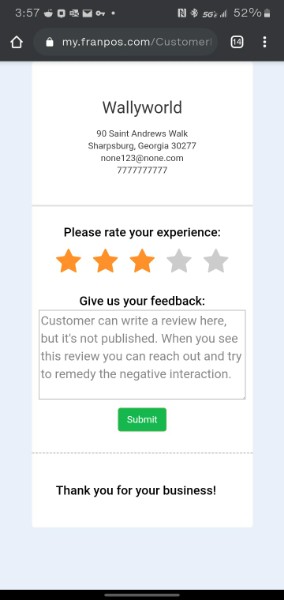
When customers leave a rating that is below the Rating Threshold, they will be given the opportunity to express why their experience was unsatisfactory.
When a customer leaves a rating that is equal to or above the Rating Threshold, they will be given the opportunity to follow links to the social media sites that you have configured.
Please Note- Reviews that are collected by Franpos do not automatically push to social media sites. Customers will have to click the link to your social media, and leave a review separately on this site. Our aim is to gatekeep negative ratings and amplify positive ratings.
Related Articles
Basic Email Campaign (Marketing)
To start with yout first campaign, you need to create an email Template. You can create templates in Back Office Marketing >> Templates. Here 'My Templates' are the ones available only for the selected location, 'Shared Templates' are shared from the ...Automated Marketing/Growth Marketing
With the Growth Marketing add-on, Franpos will allow you to create automated text message and email campaigns that deliver to your customers based on triggers. Prerequisite:- Settings > Account > My plan and billing > Select Automated Marketing ...How to Sign Up for Growth Marketing in Franpos
Franpos offers Growth Marketing, which includes SMS and email marketing to help you engage with your customers effectively. Follow the steps below to sign up and activate this feature. Step 1: Request Growth Marketing Access Log in to your Franpos ...Cross-Sell Campaign – First Specific Product/Service Order
?️ Cross-Sell Campaign – First Specific Product/Service Order Automatically promote complementary products or services after a customer’s first purchase of a specific item. Ideal for introducing add-ons, bundles, or upgrades that enhance the initial ...Same-Day Capacity Offer: Fill Today’s Open Slots
⚡ Same-Day Capacity Offer: Fill Today’s Open Slots If today’s bookings fall below your target (e.g., 80% of capacity), send a quick SMS with a discount code to convert last-minute openings into sales. What it does Checks today’s capacity once per ...