How to Create a Discount Barcode and Assign It to Your Marketing Campaign
1. Create a manual discount (if not created). (Marketing -> Discounts -> press '+' to Add a manual discount)
Assign a custom discount code that will be used to generate a barcode.
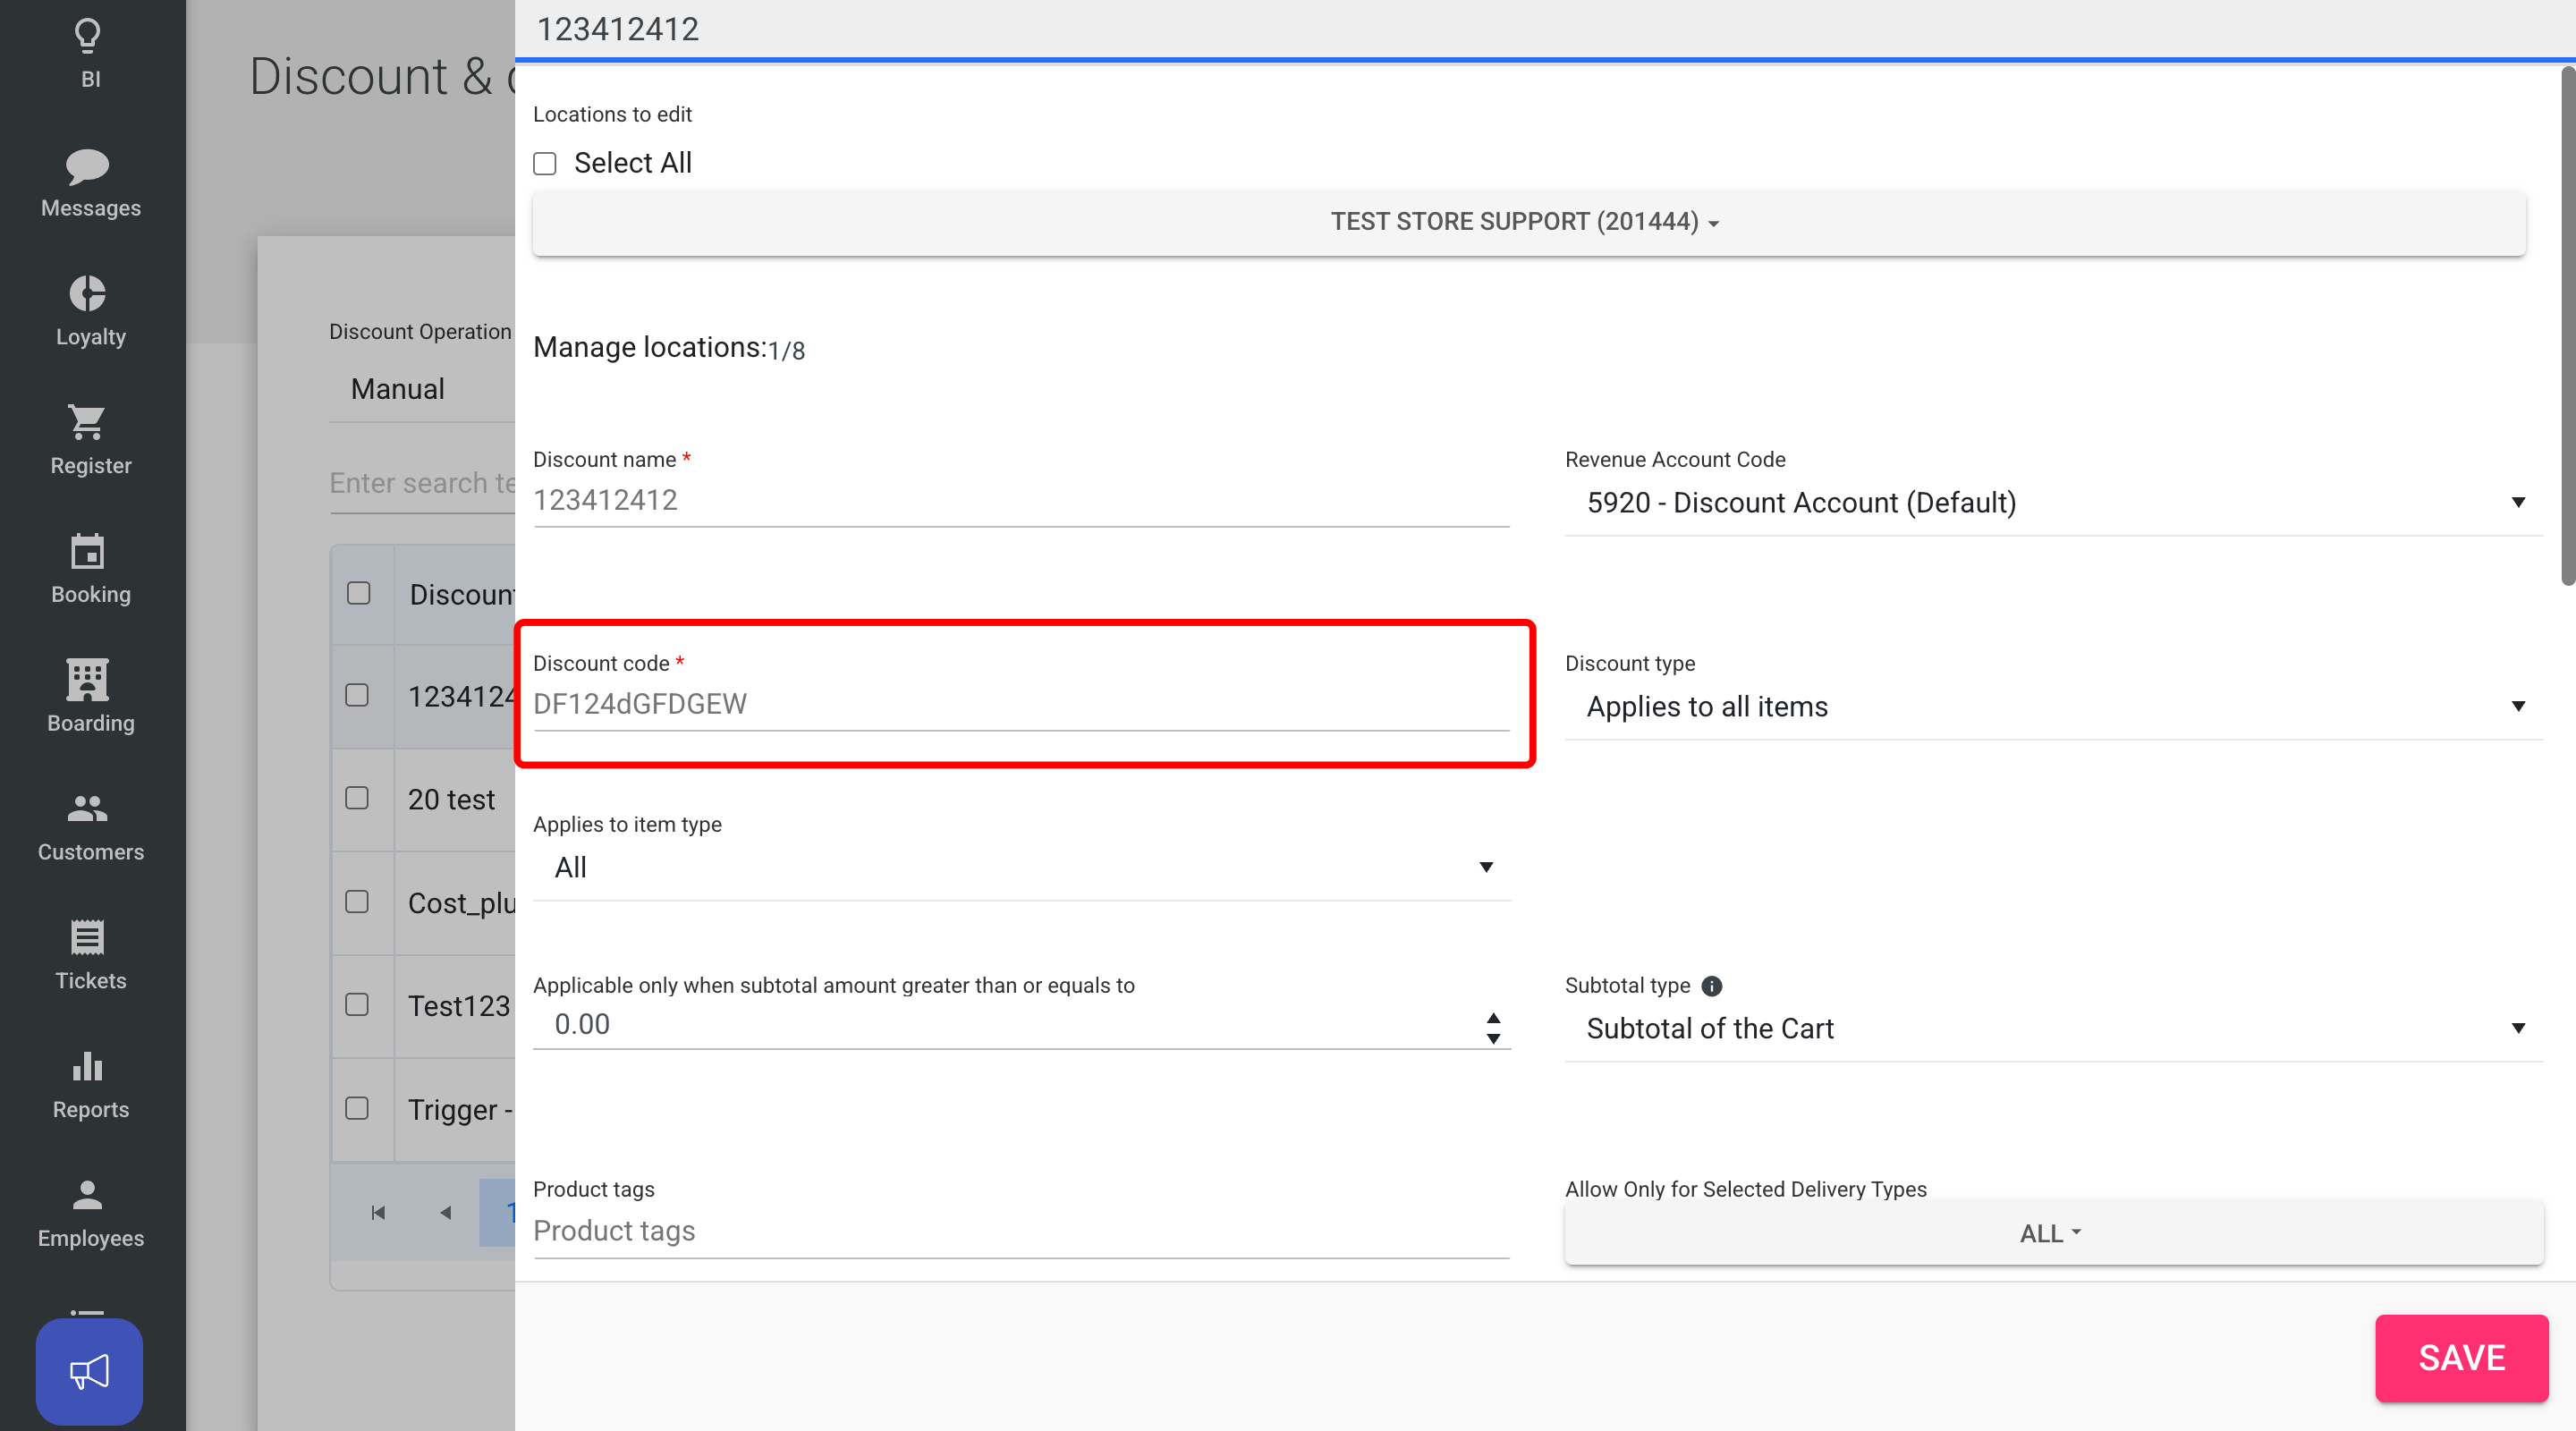
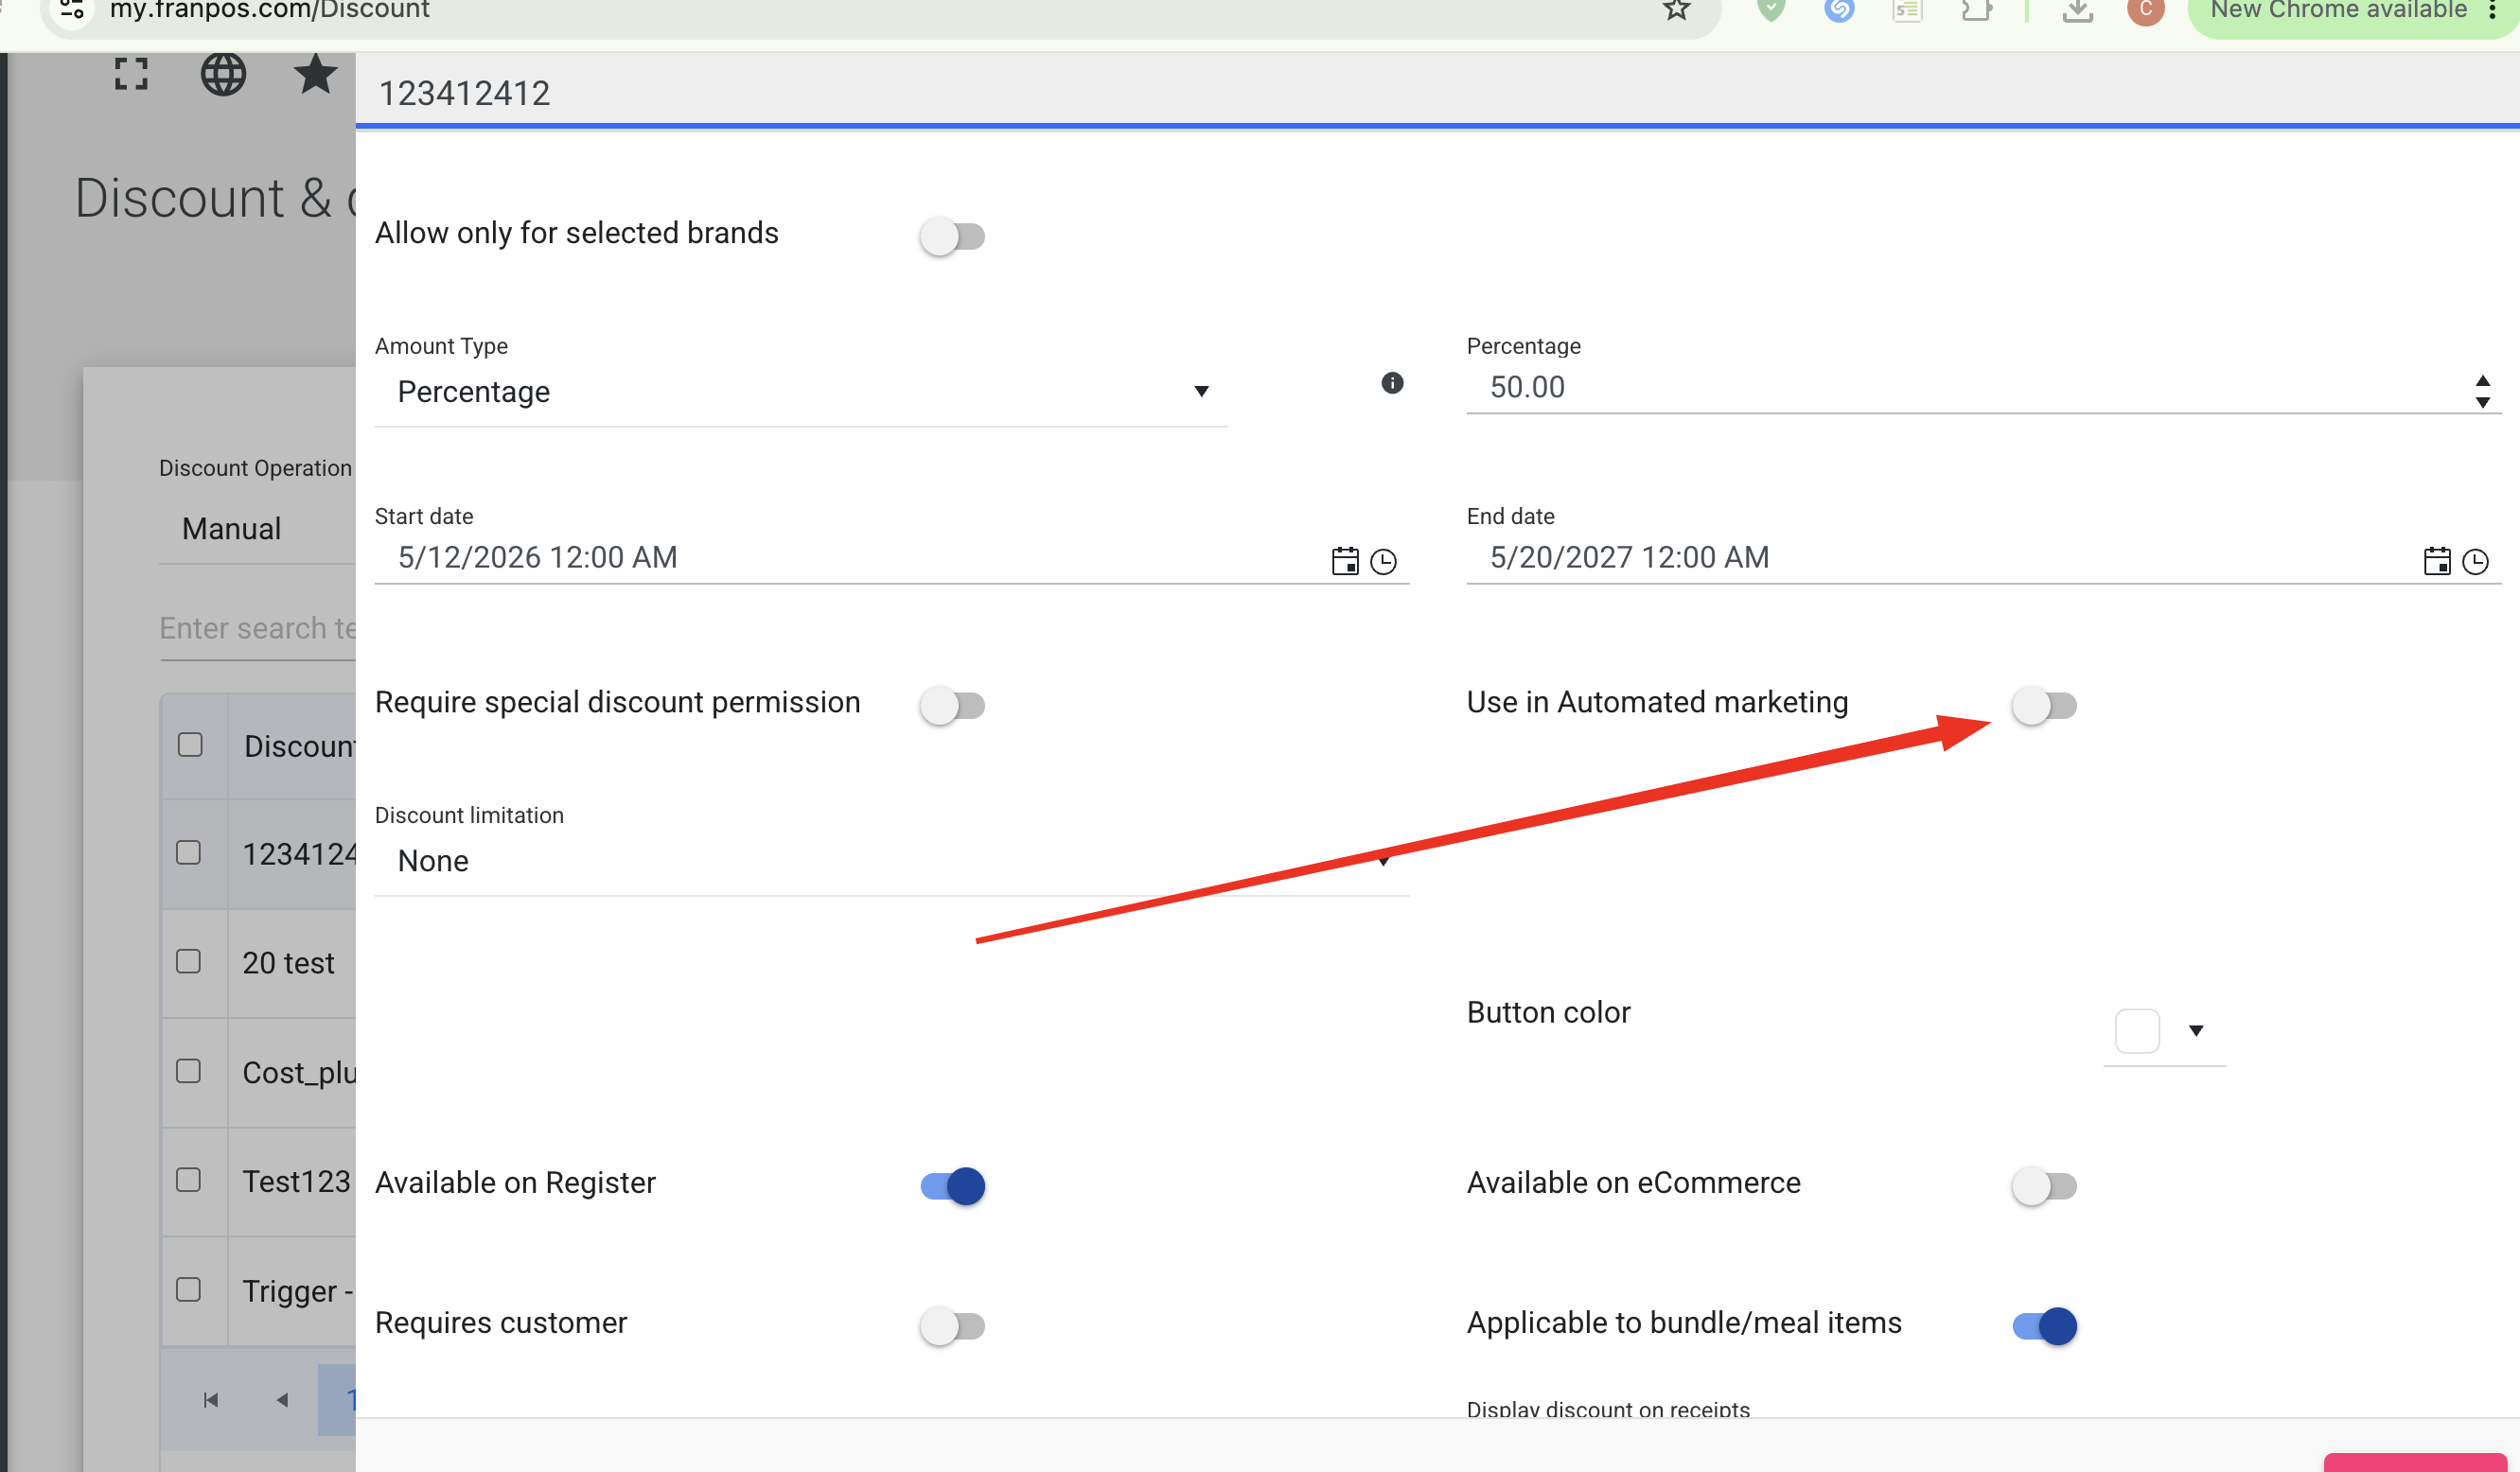
If you want to hide the discount from the register discount list, you can enable the “Use in Automated Marketing” toggle. In this case, employees will not be able to see the discount in the list, but will still be able to apply it by entering the code or scanning the barcode.
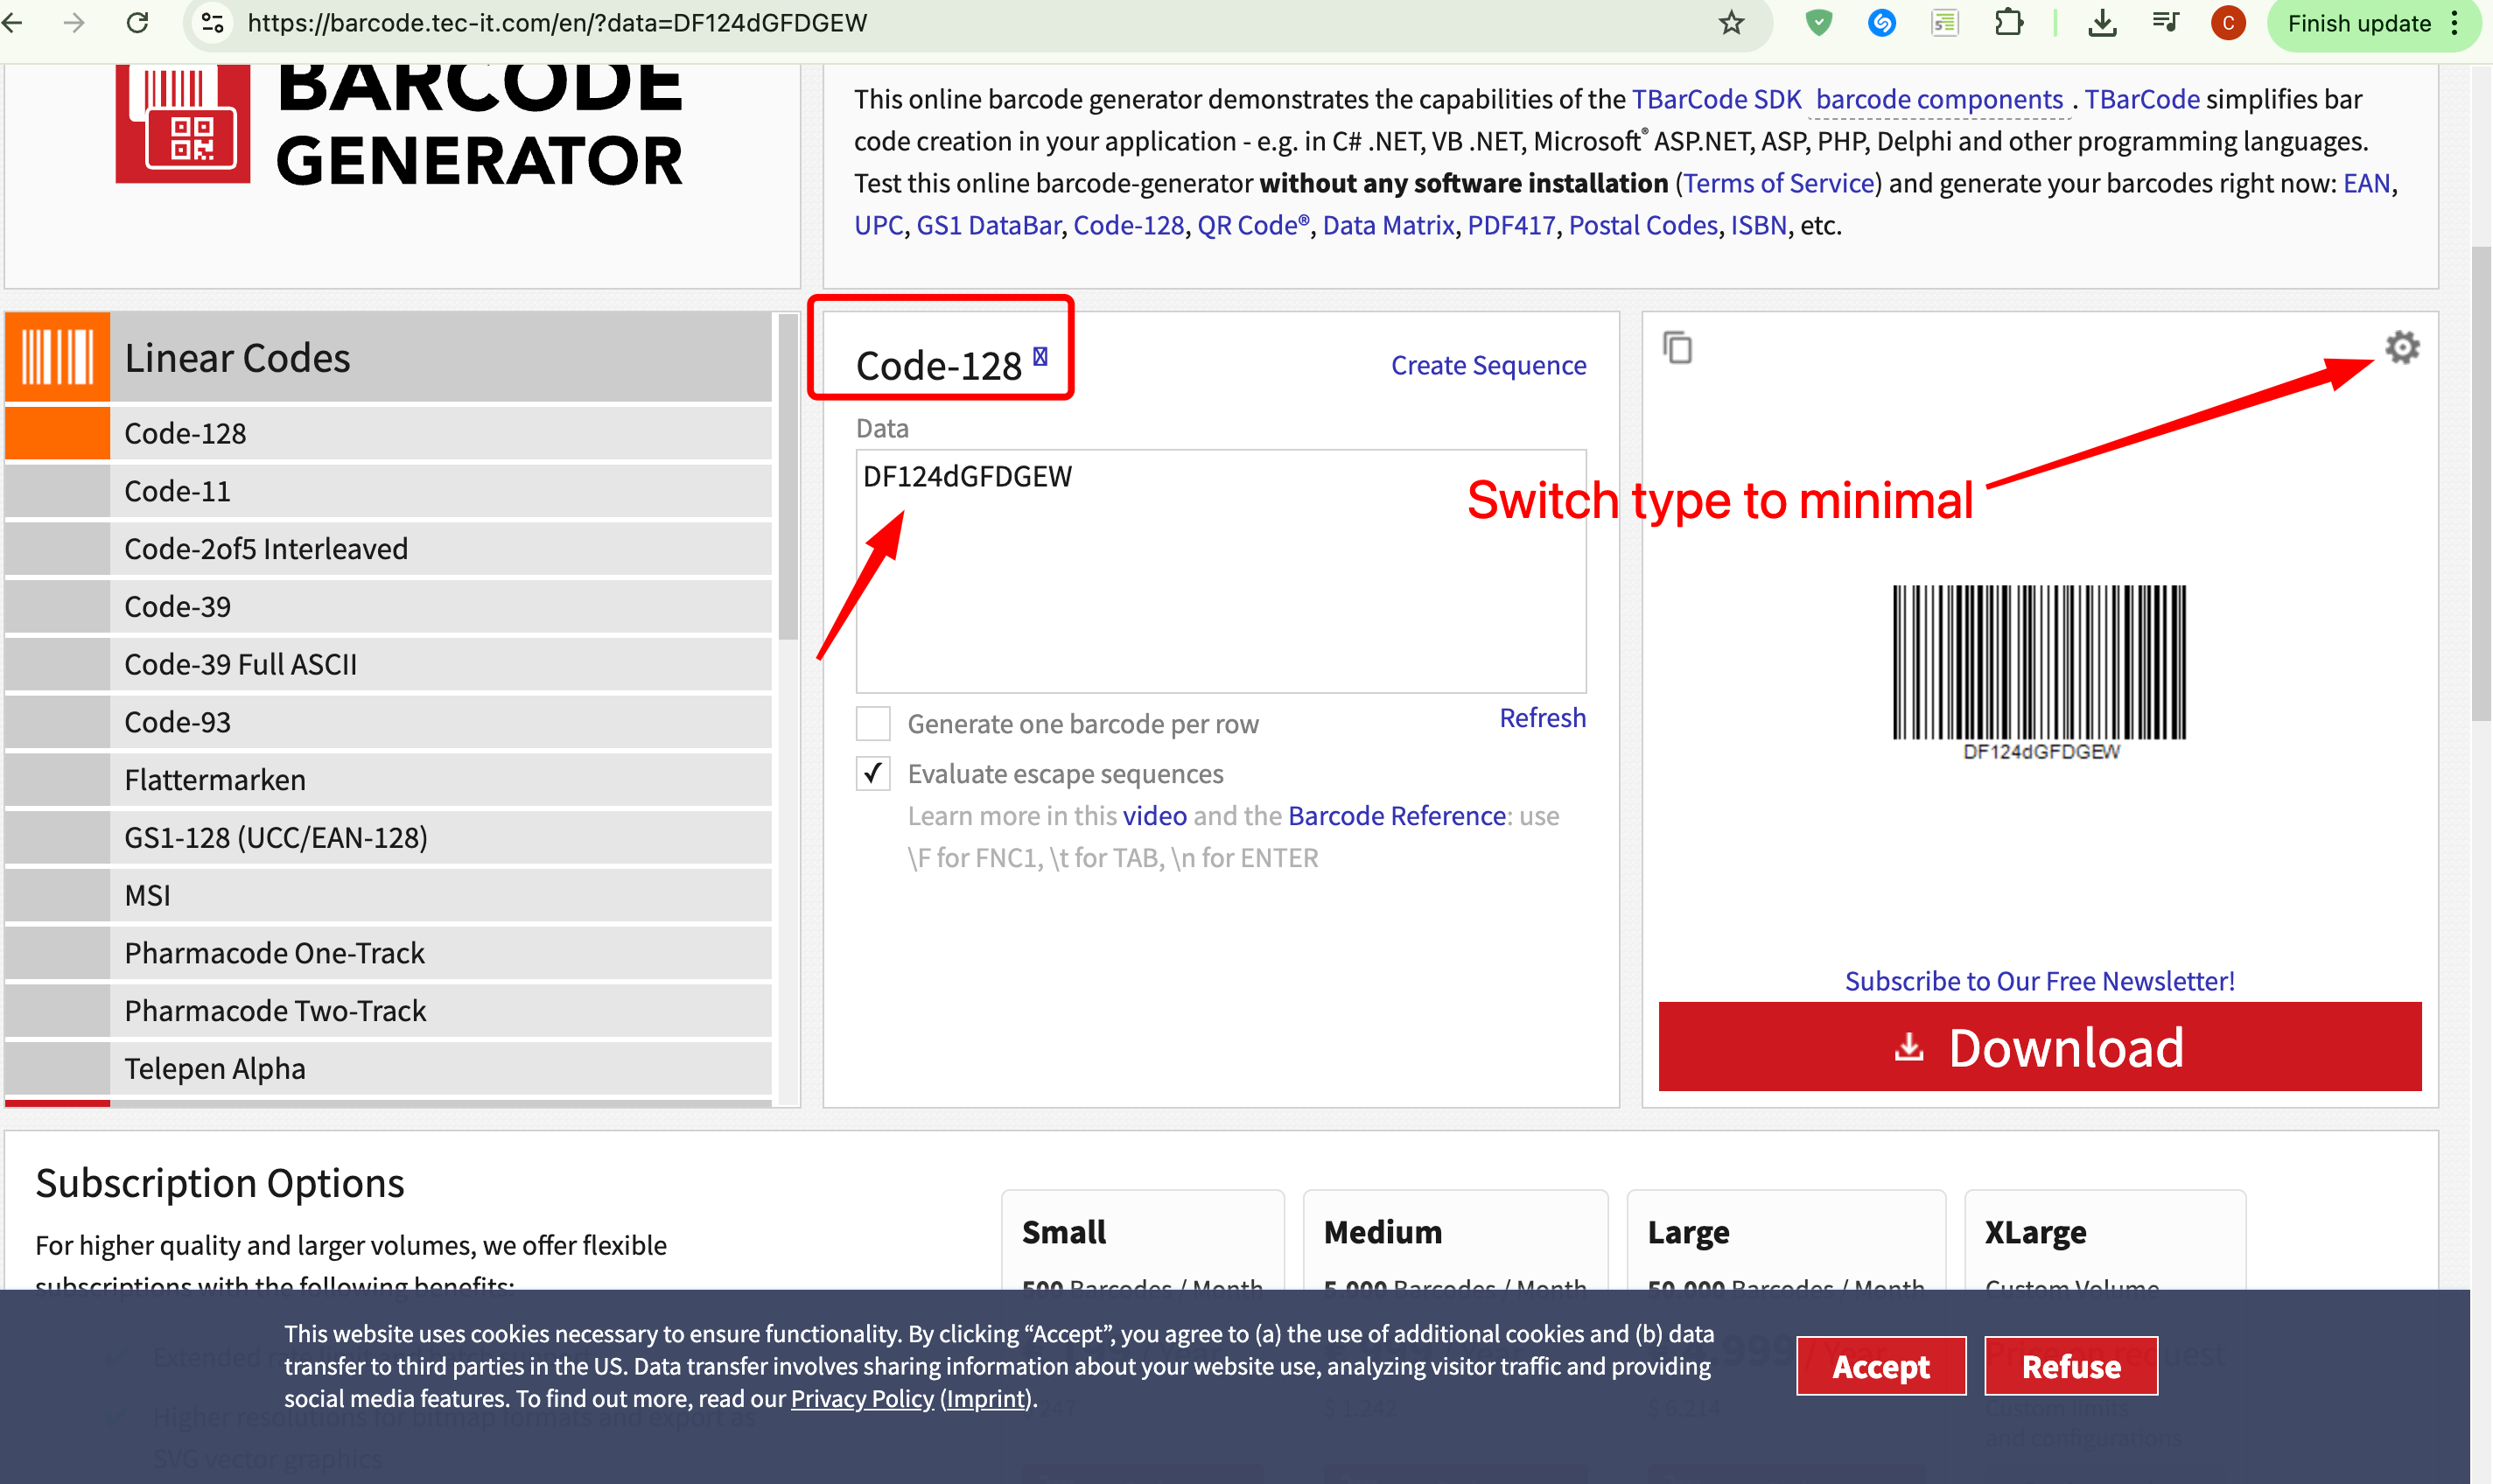
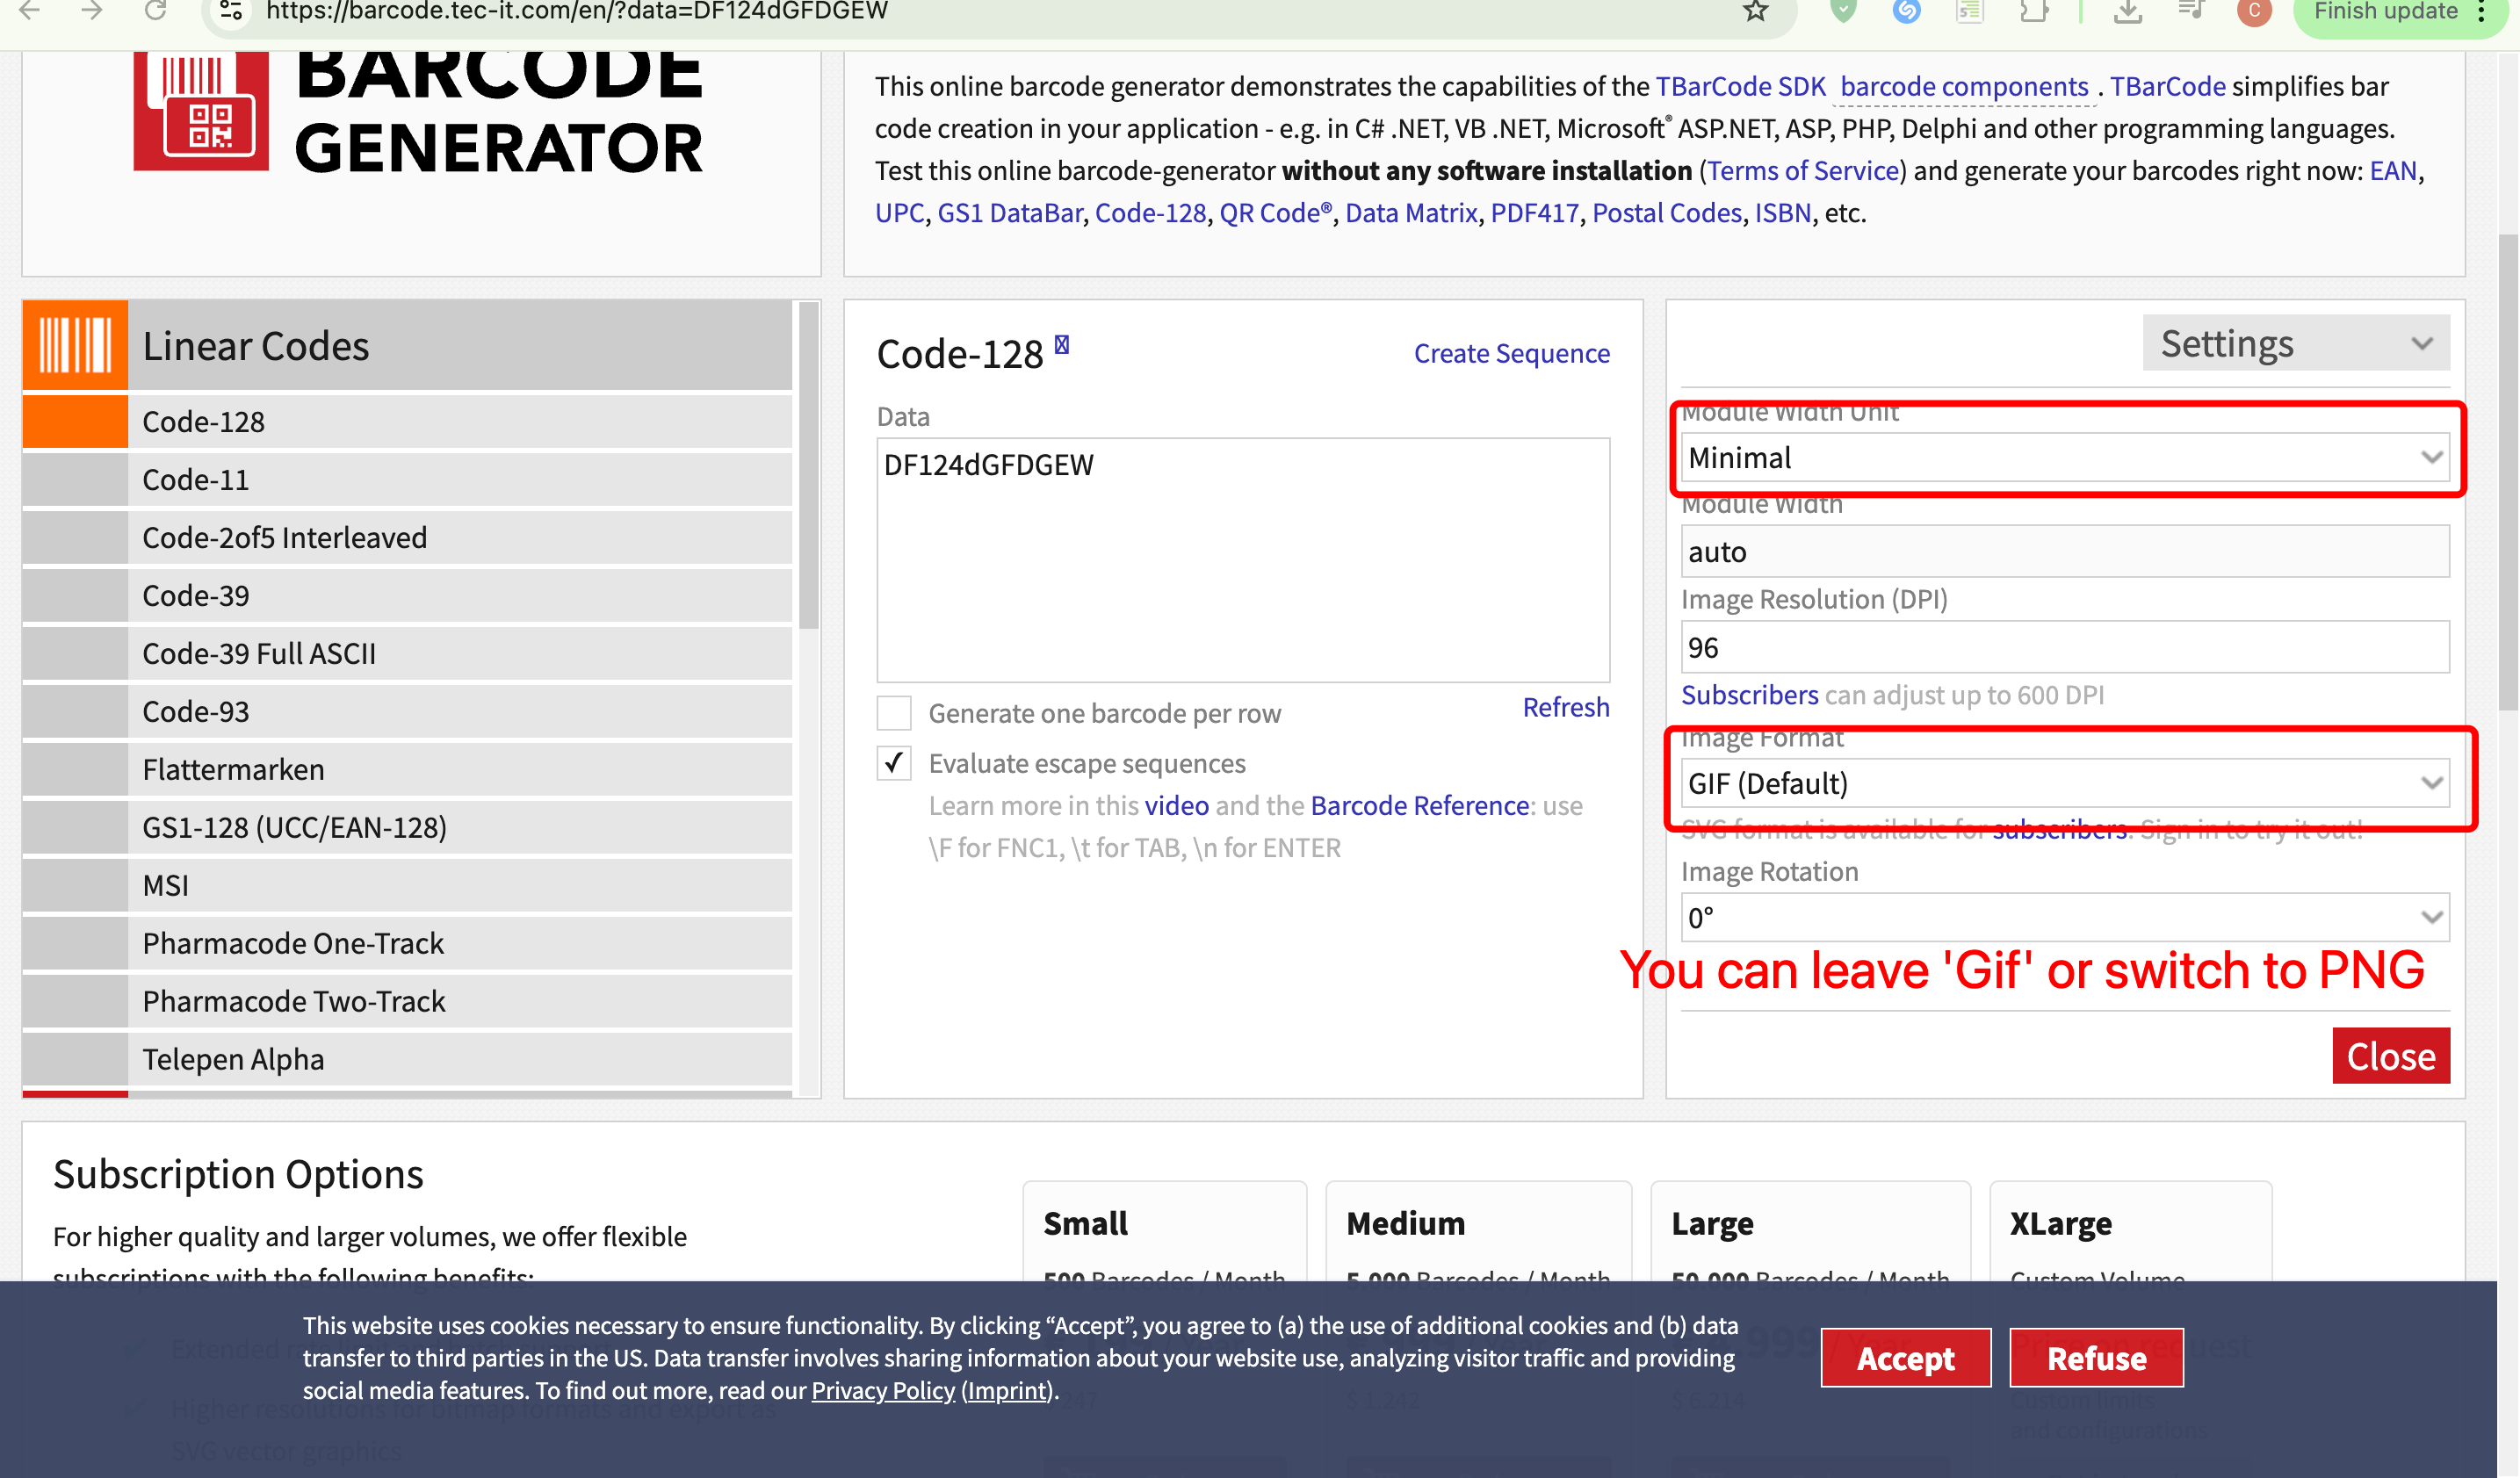
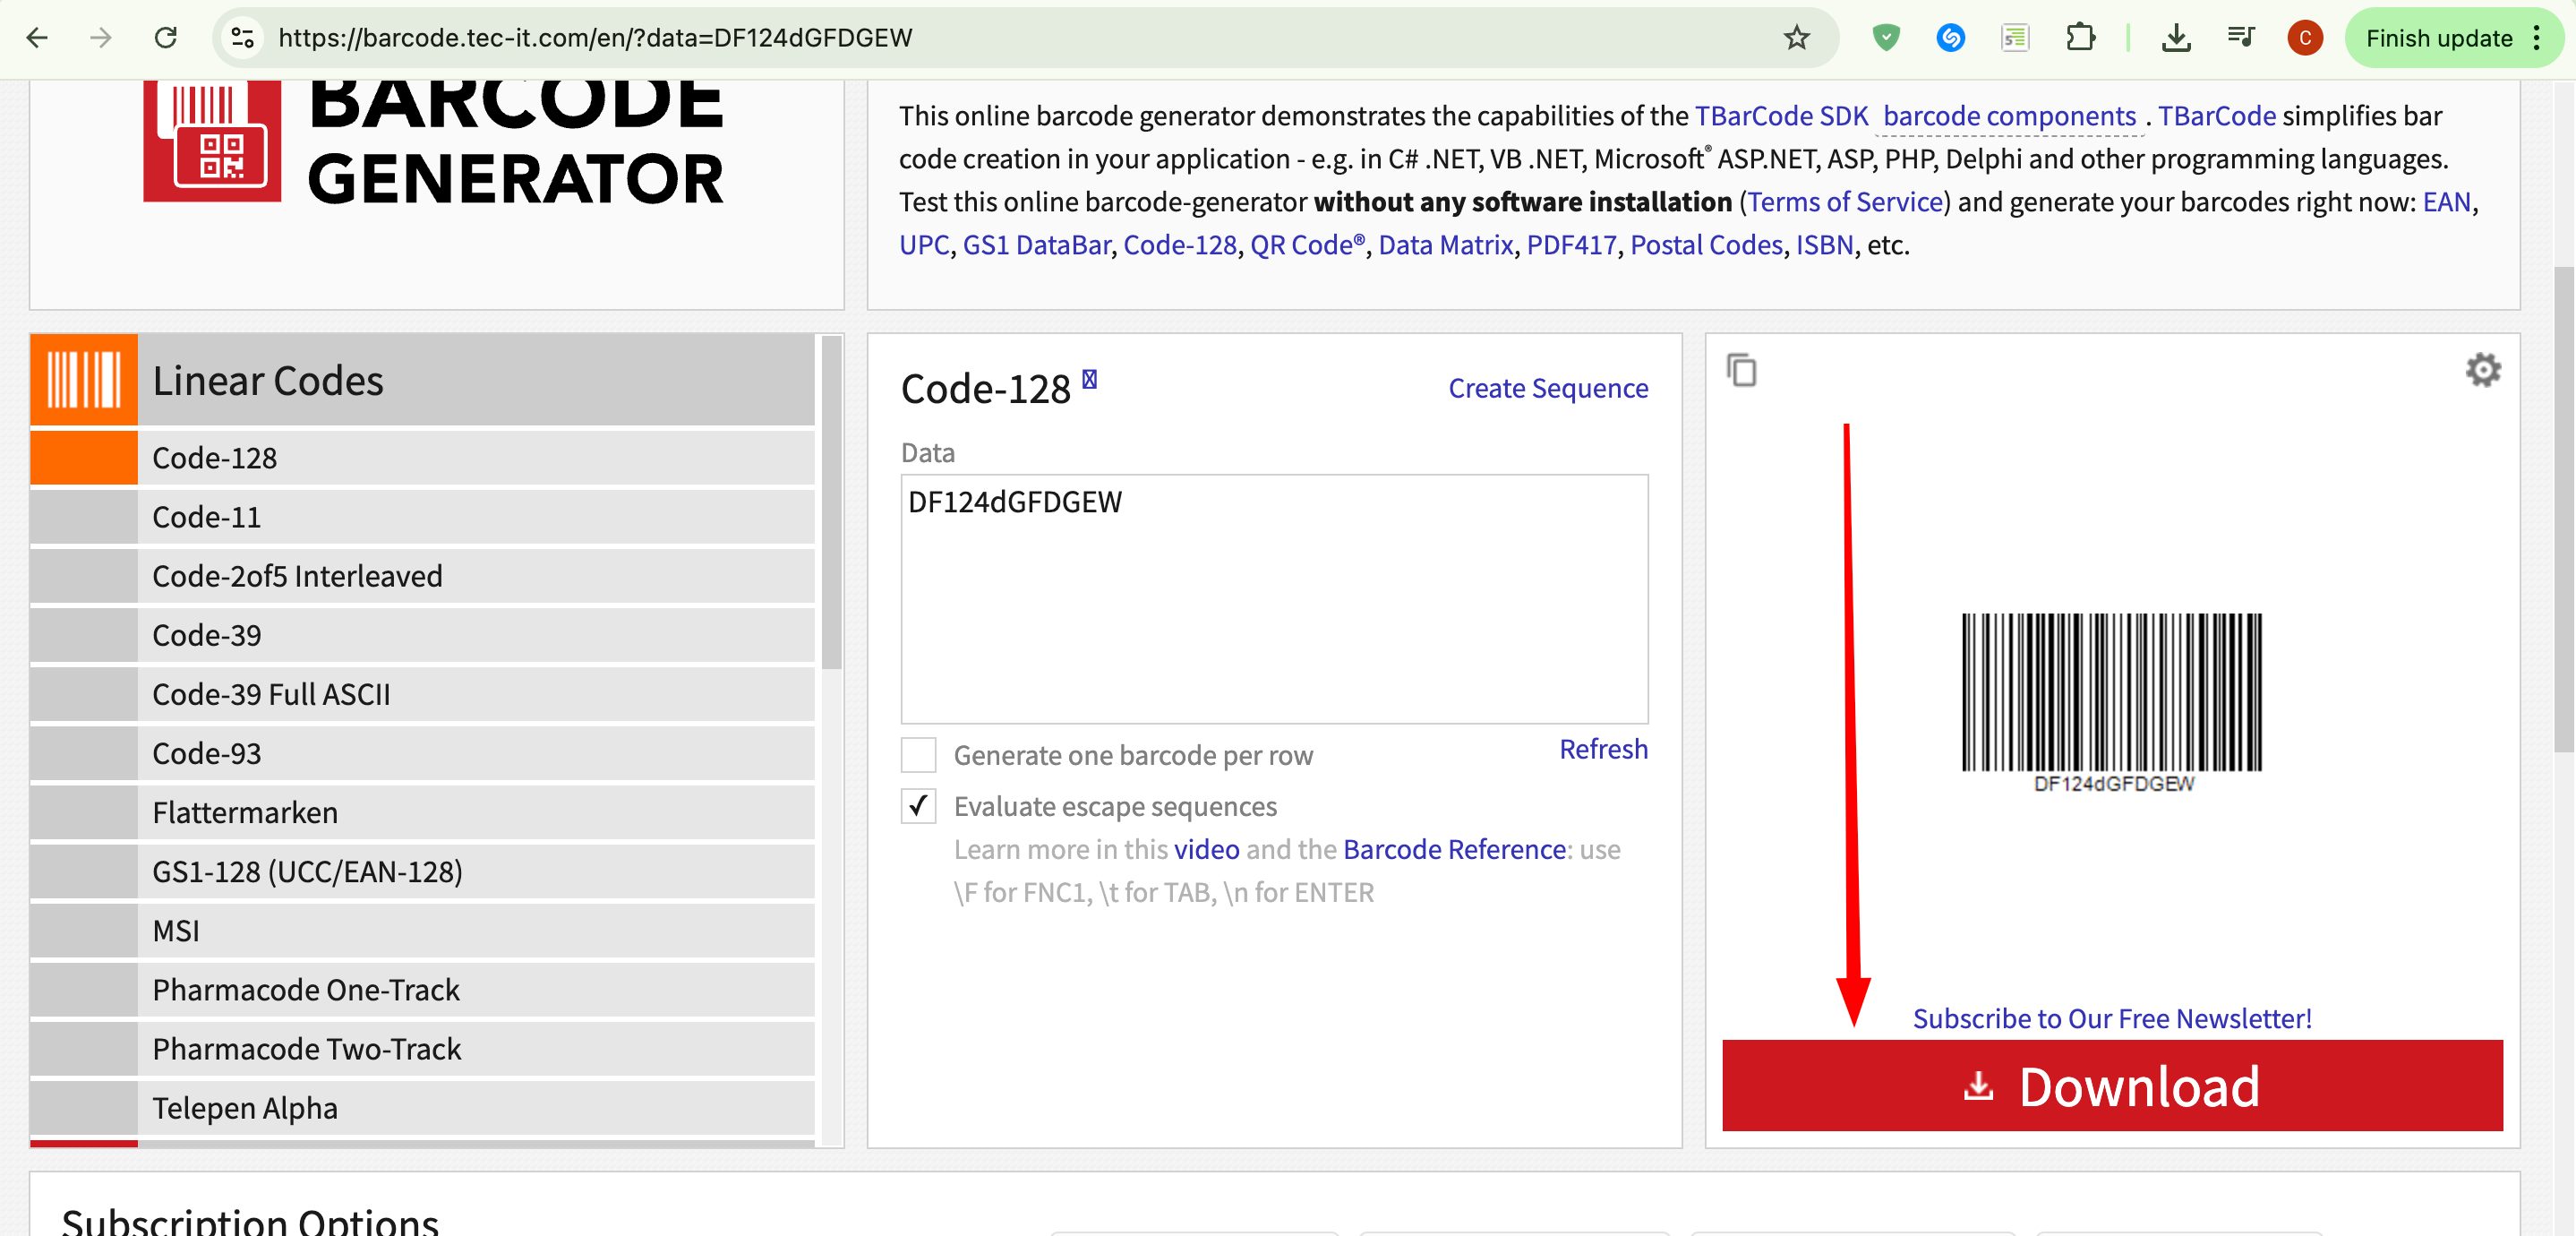
2. Once the discount is created, navigate to https://barcode.tec-it.com/en (or any similar website that converts text into barcodes) and use the discount code to generate a barcode. Once the barcode is created, you can download it.
Create a barcode using Code 128 with Minimal width (compatible with the Franpos scanner). Other barcode formats may also be used, but compatibility will depend on your specific scanner model.
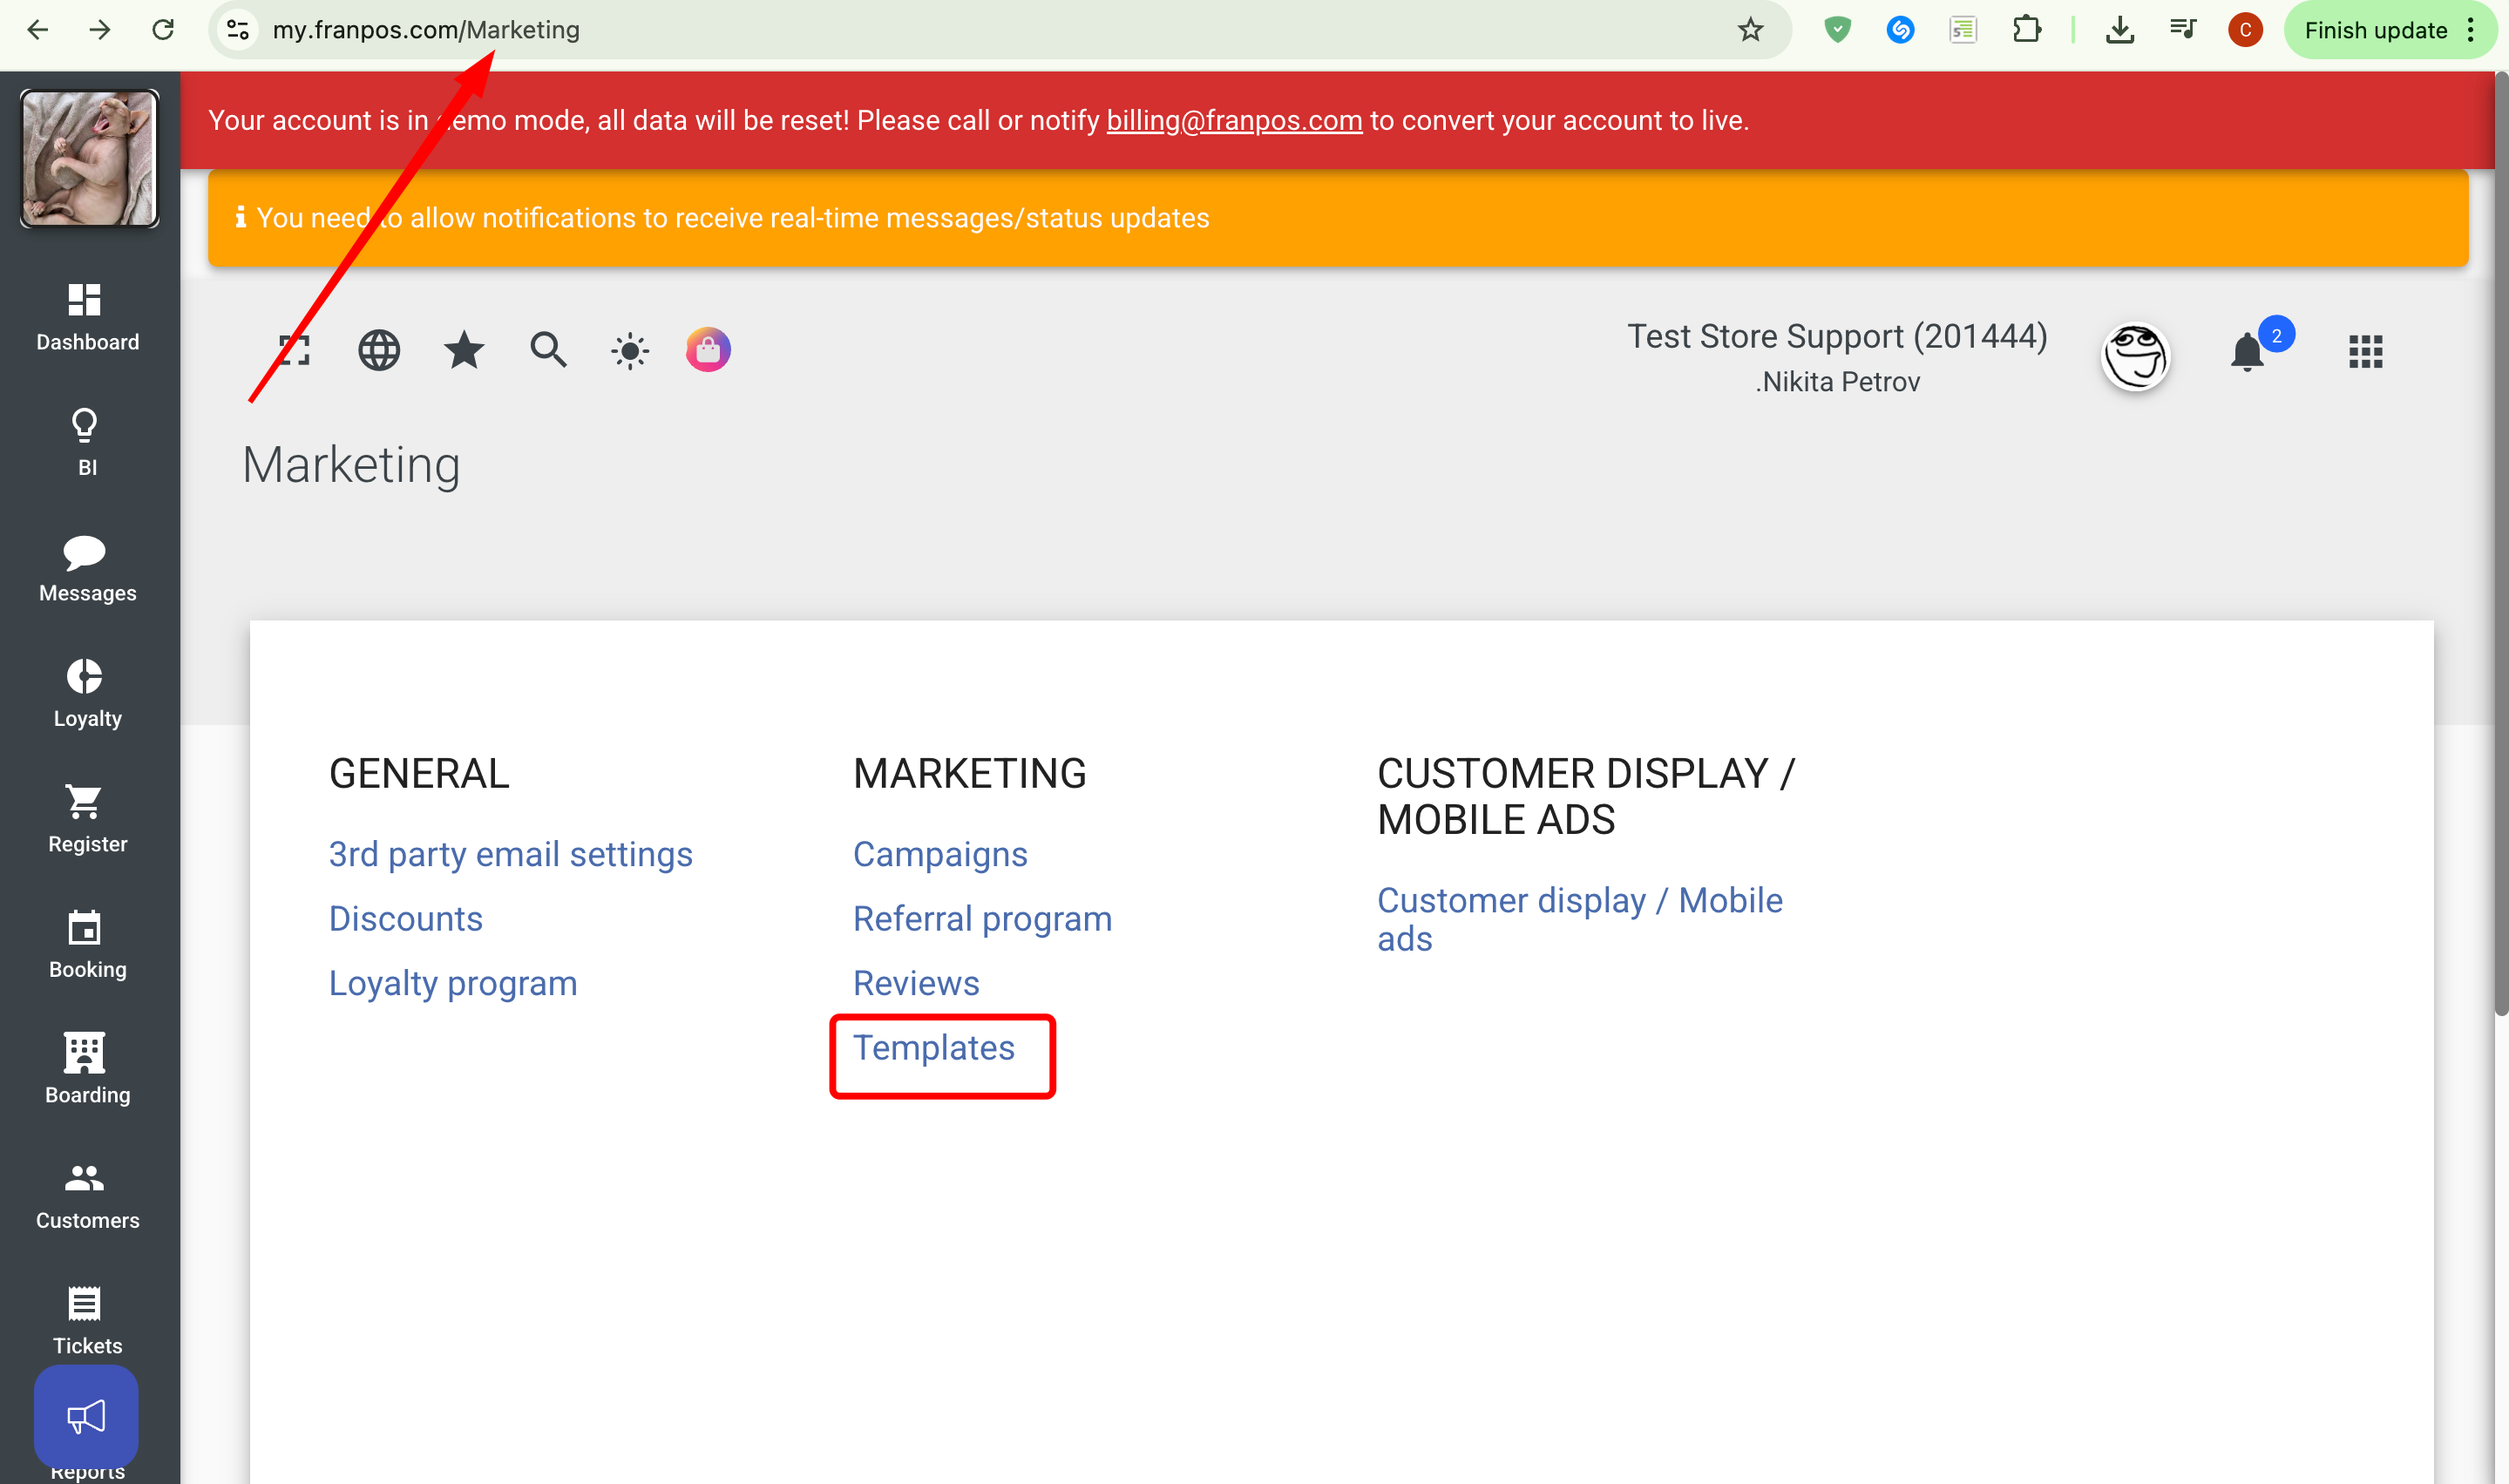
3. 3. Adjust your email templates with the coupon by adding a barcode. (Marketing -> Templates -> Open or create a template with a coupon)
Open a template and add an image by dragging it below the coupon.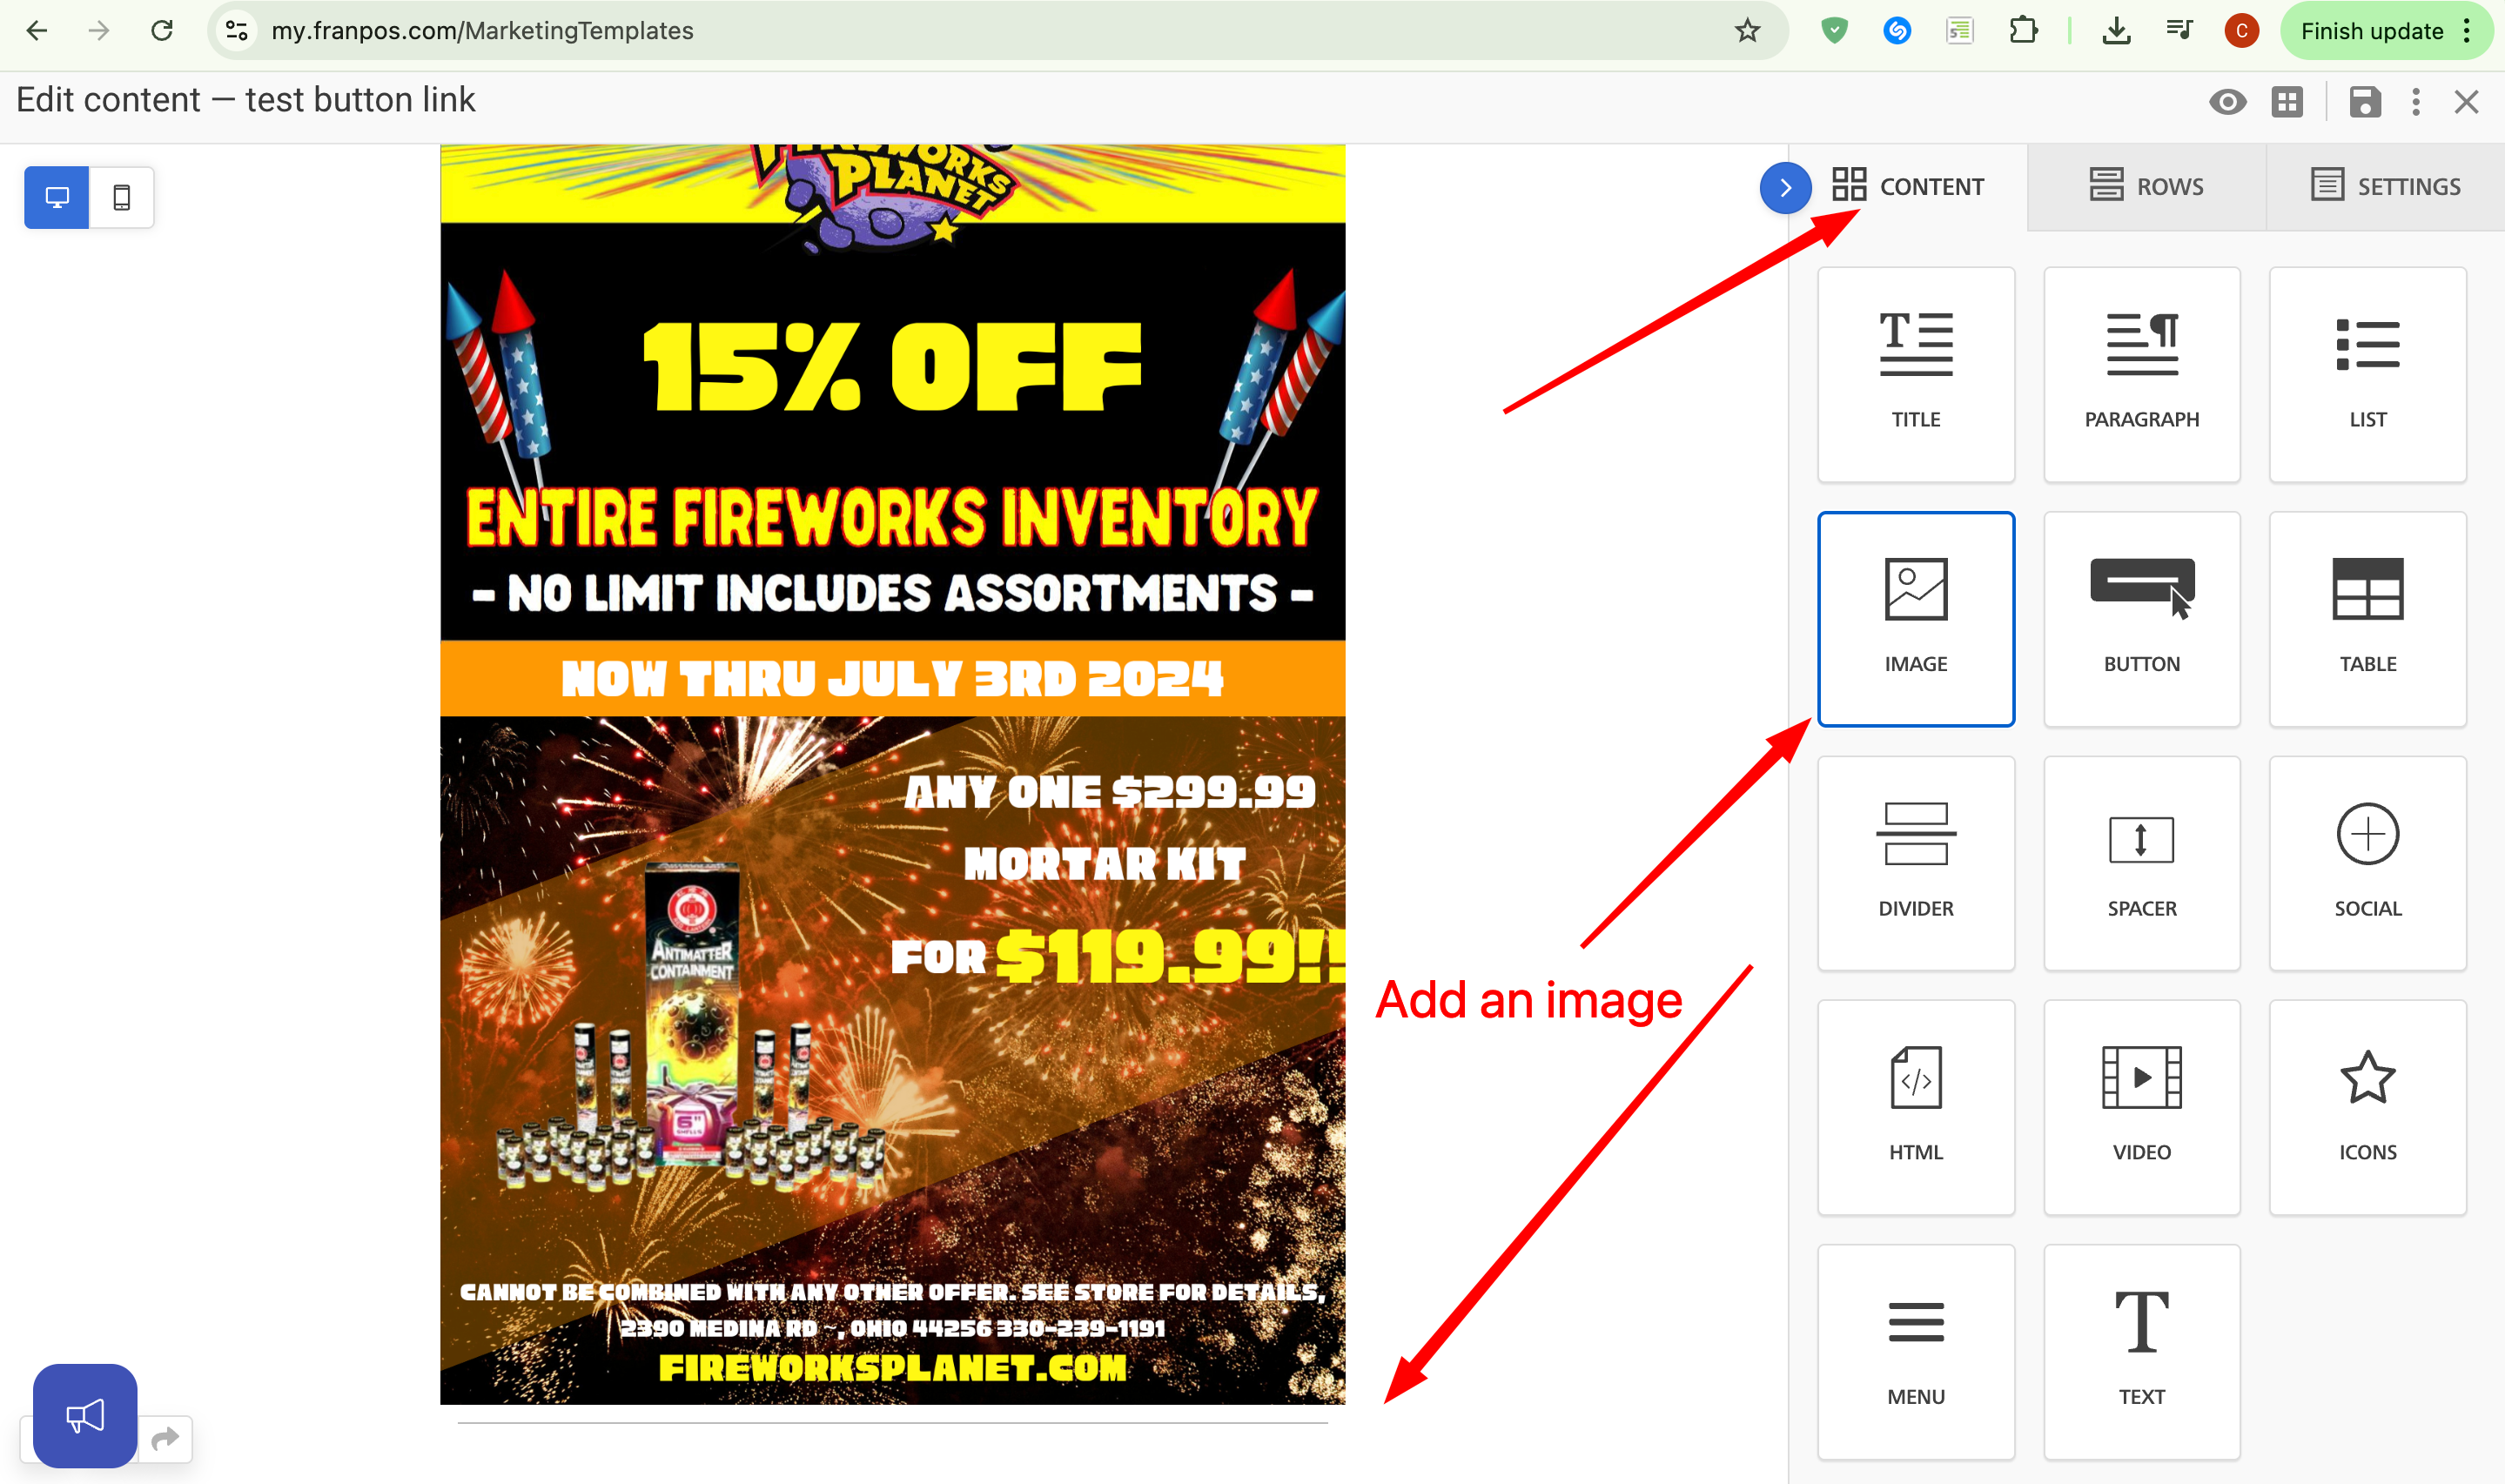
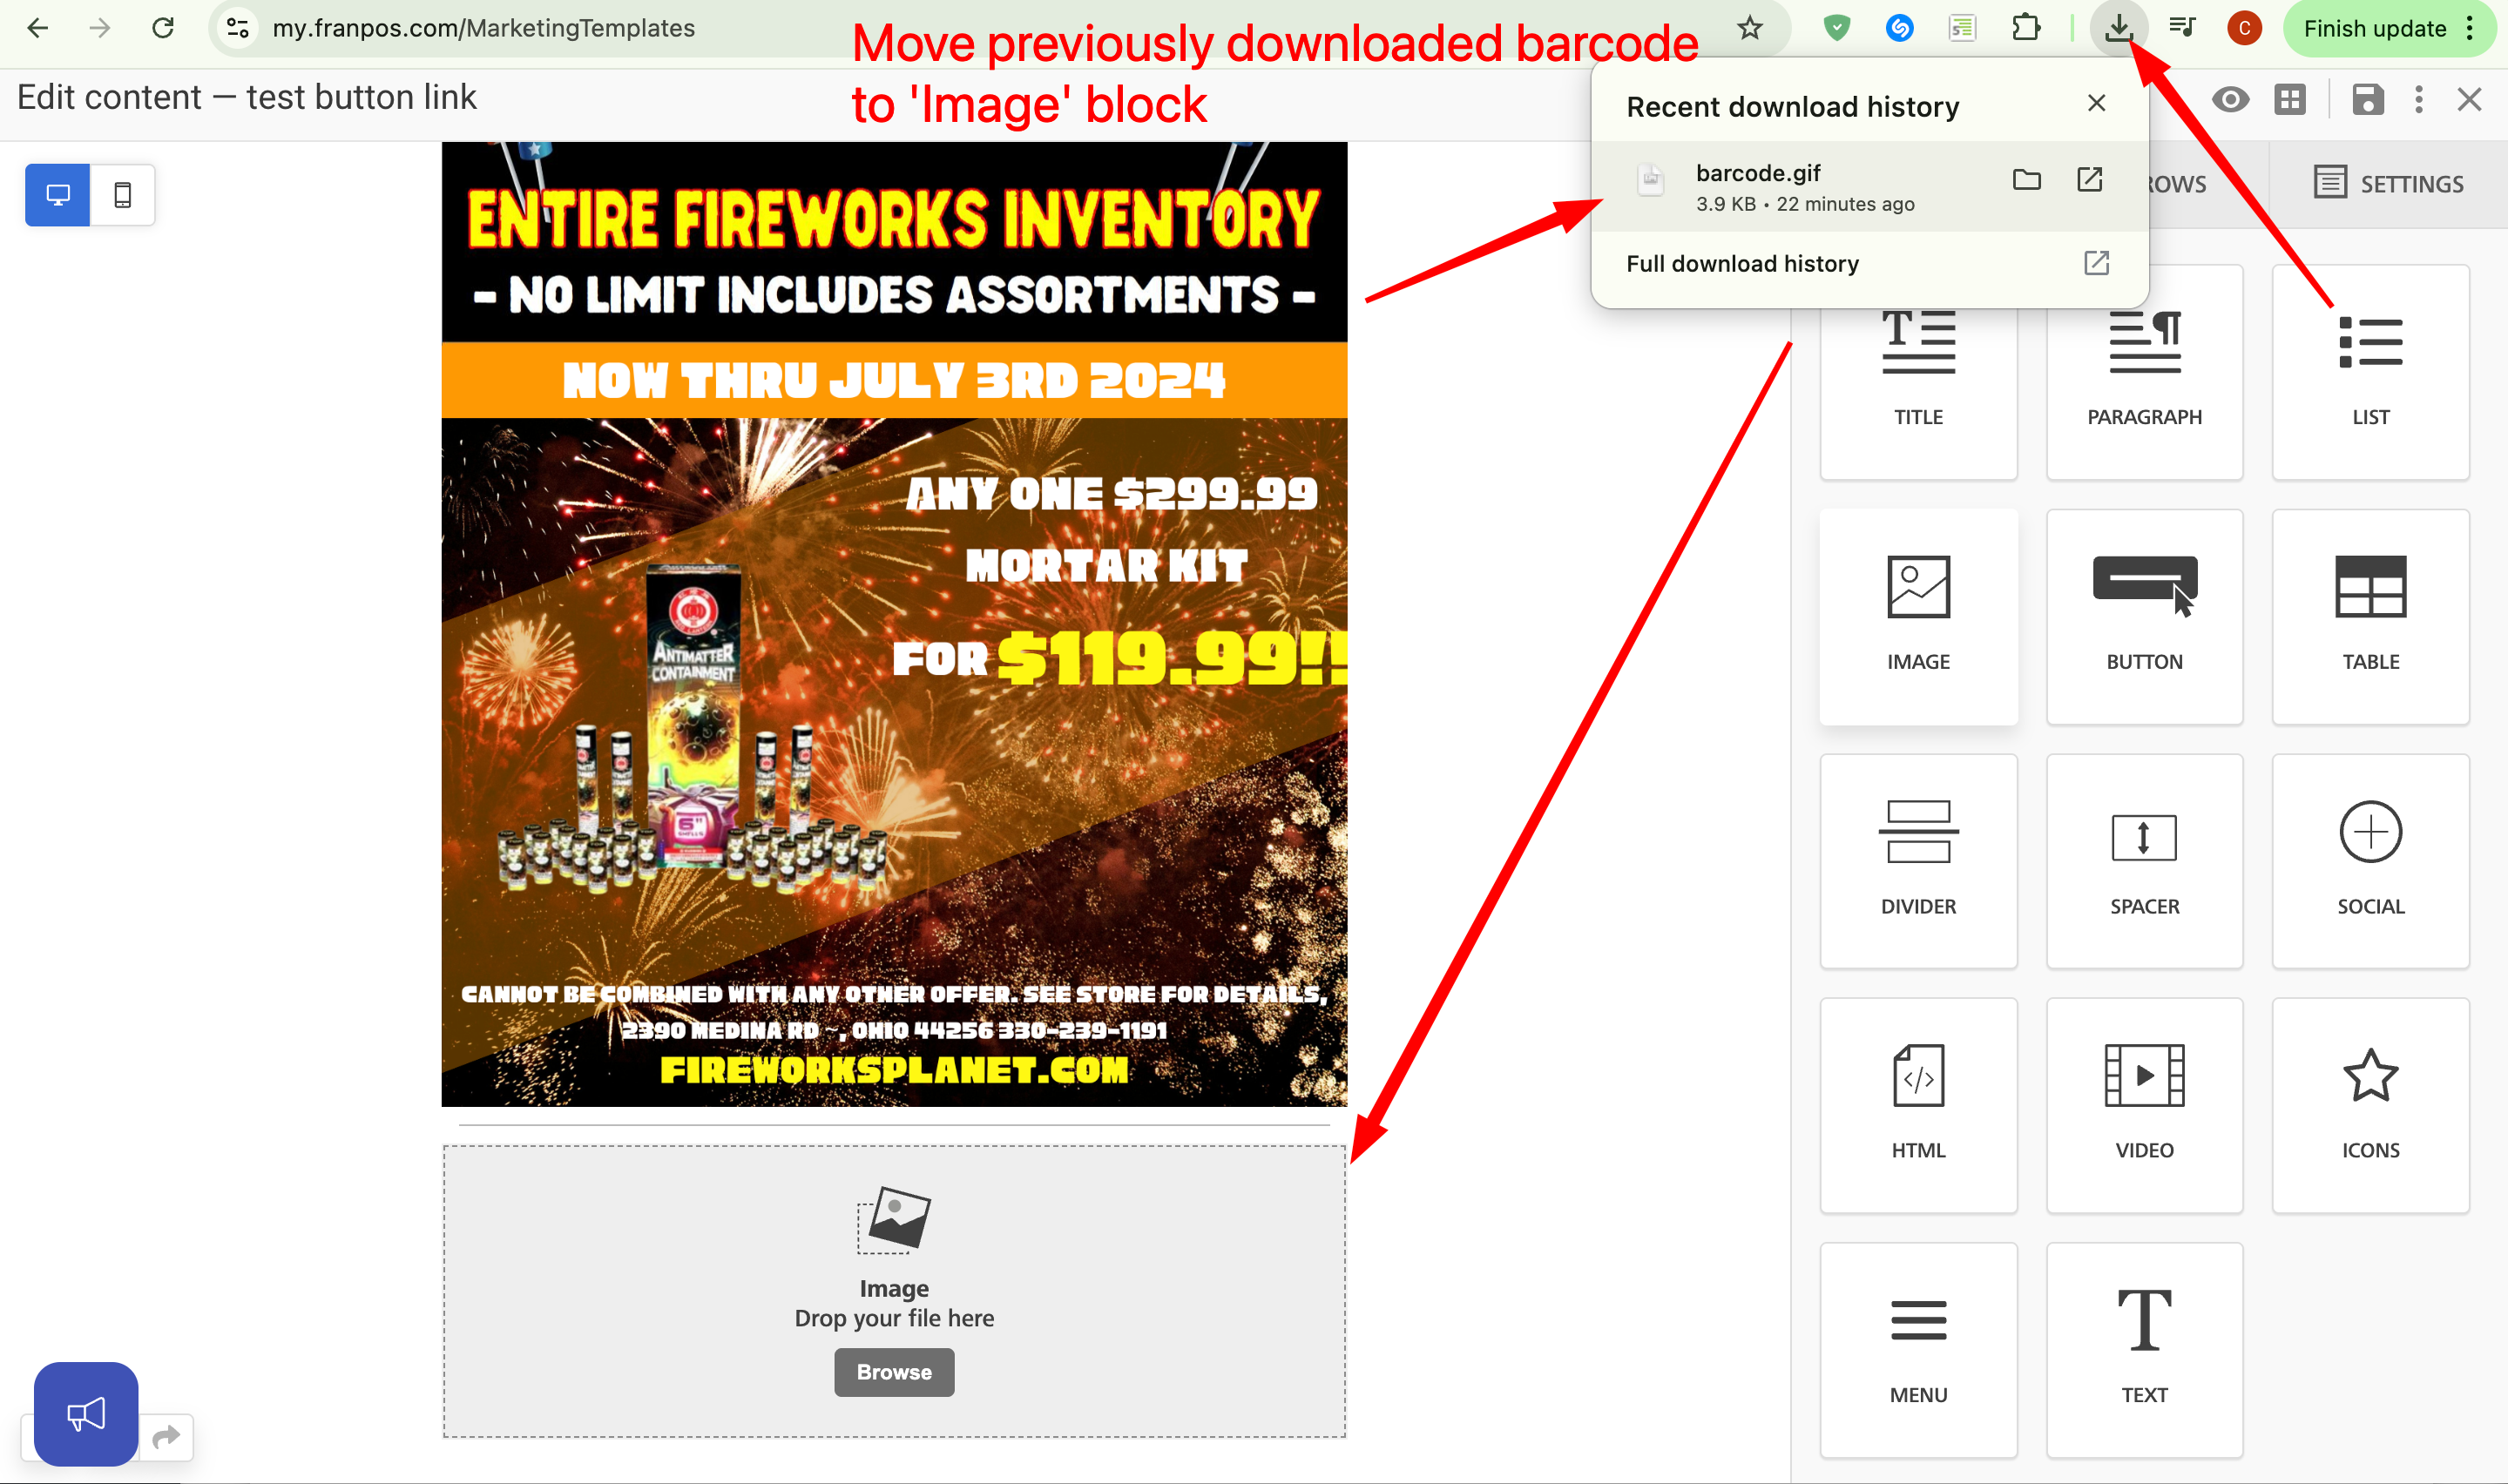
Eventually, you will have a barcode under your coupon that you can use for marketing. In the future, your employees will be able to scan this barcode from a customer’s phone to find the discount in the register, or simply enter the discount code and apply it.
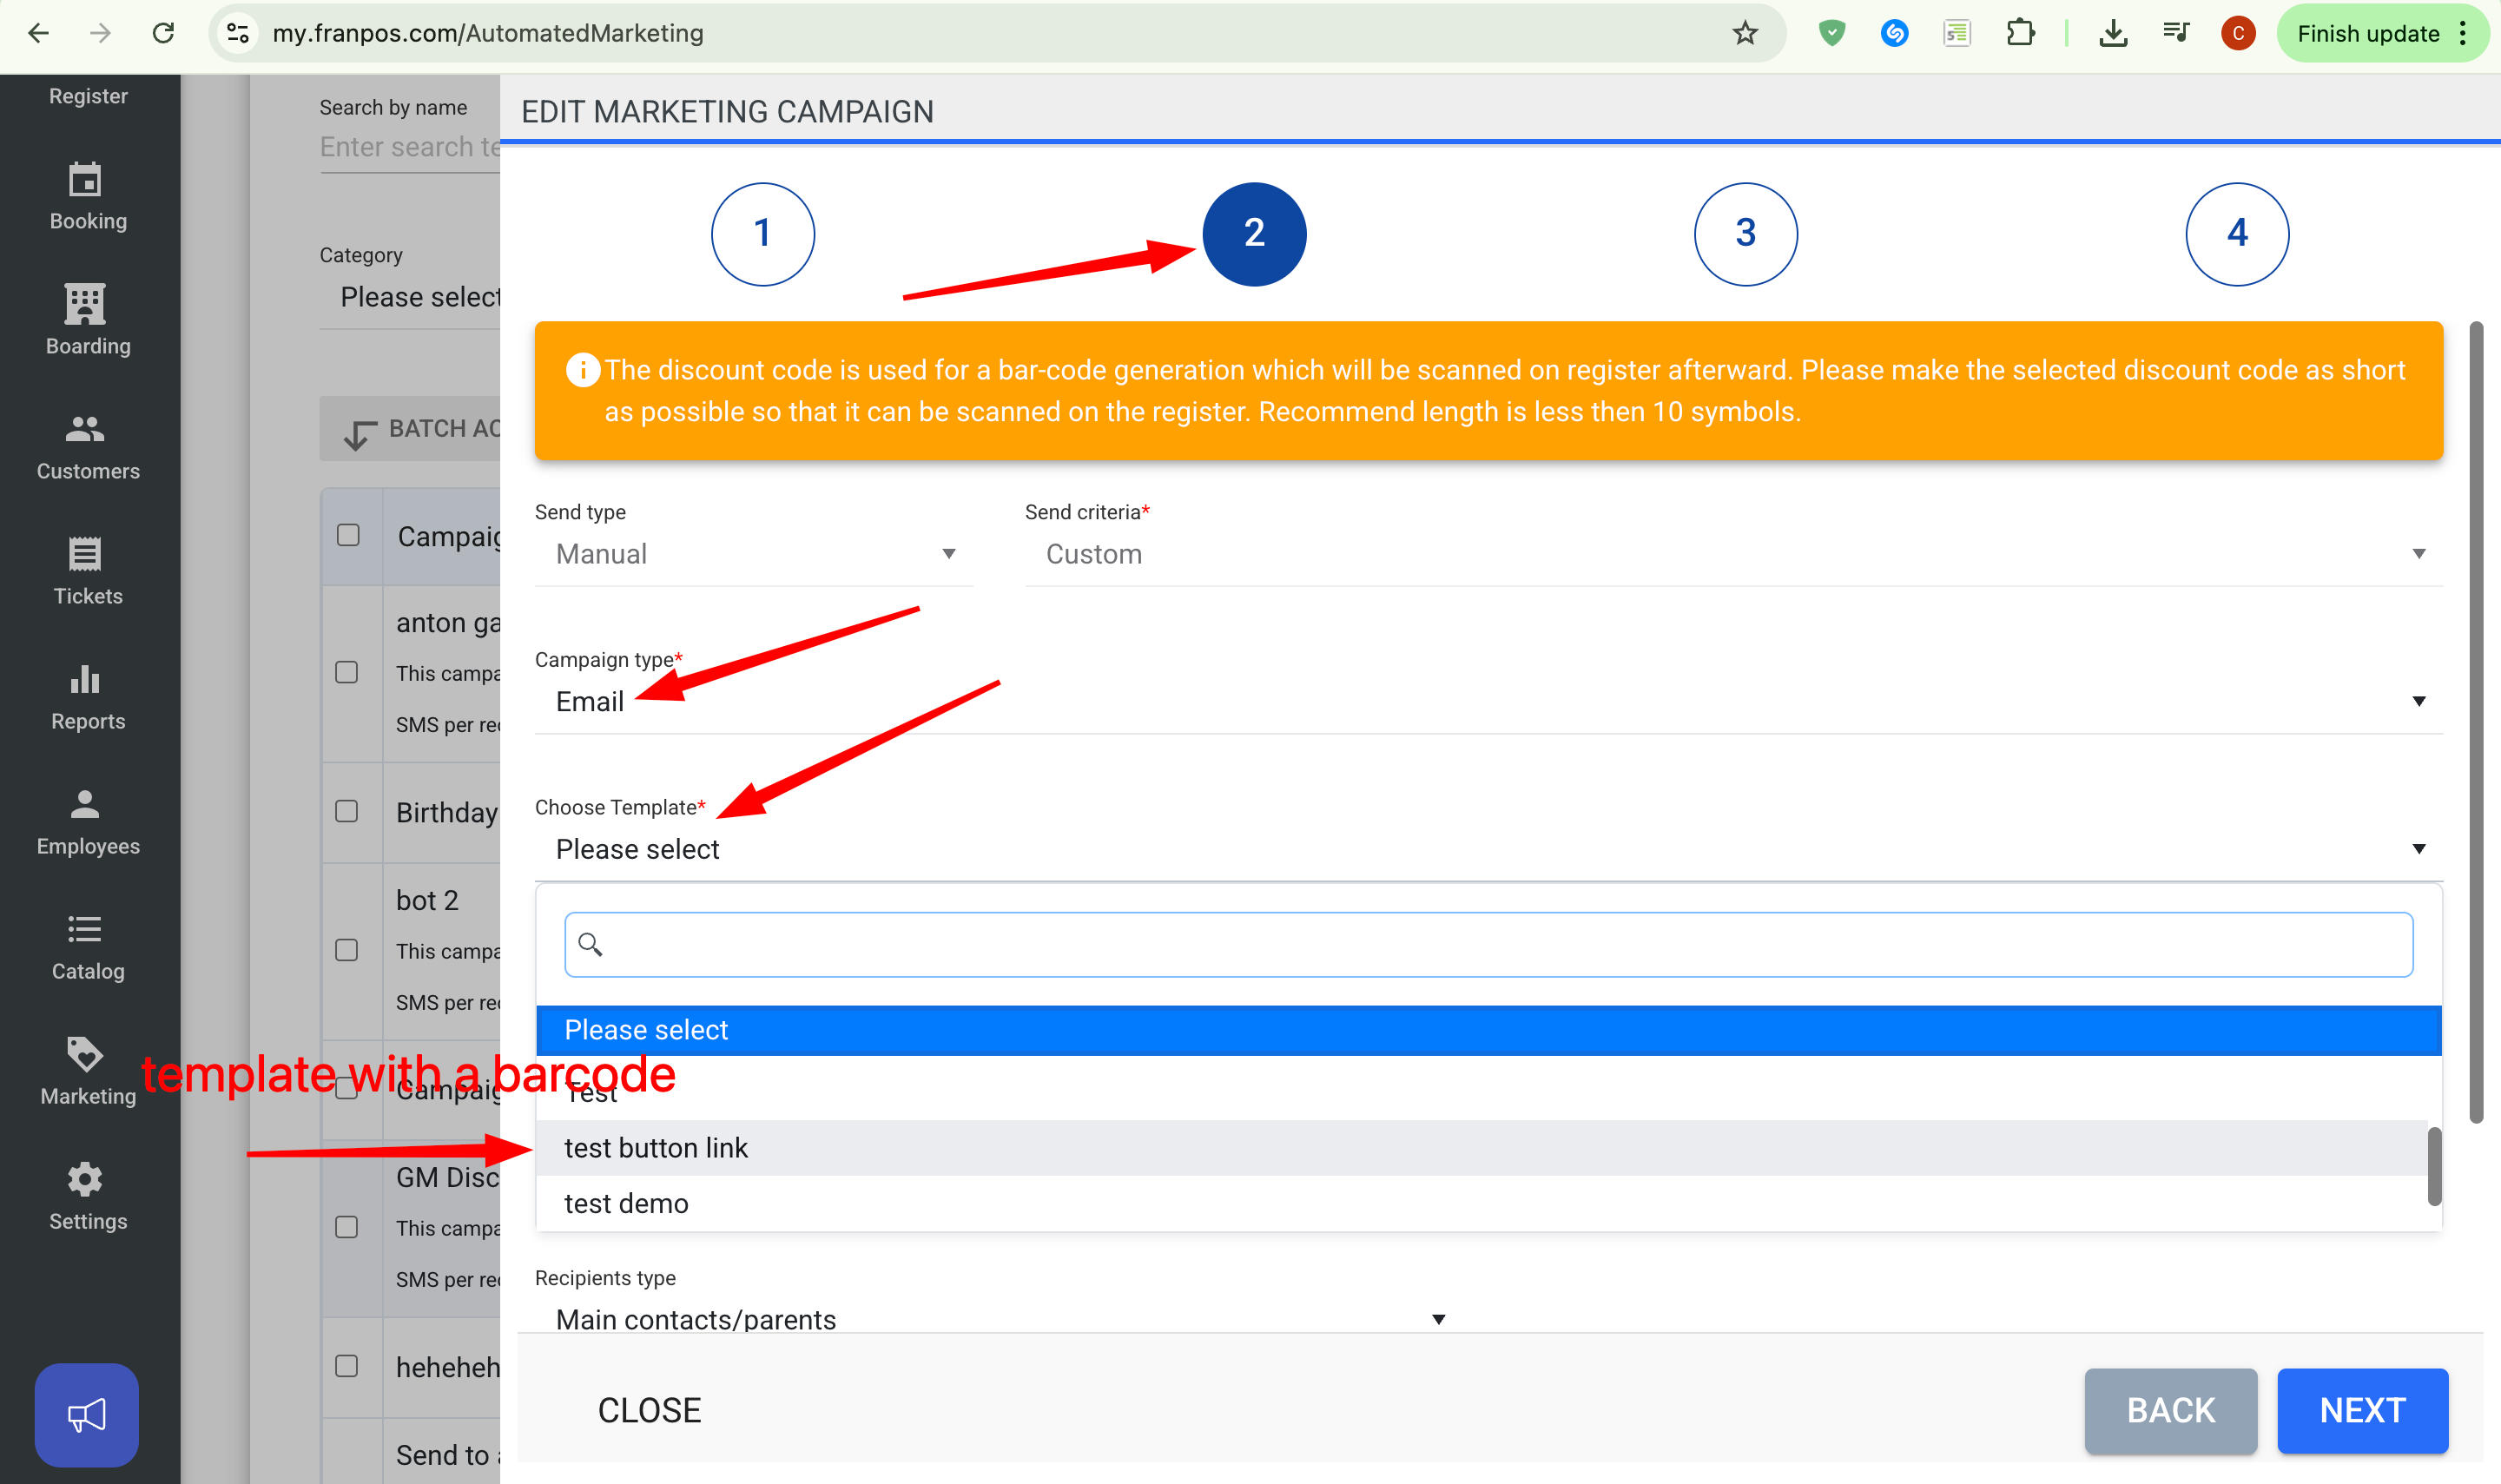
4. Create a marketing campaign or edit an existing one. Go to Marketing → Campaigns, then open a campaign or create a new one from scratch. On the second page, add a template with a barcode and coupon.
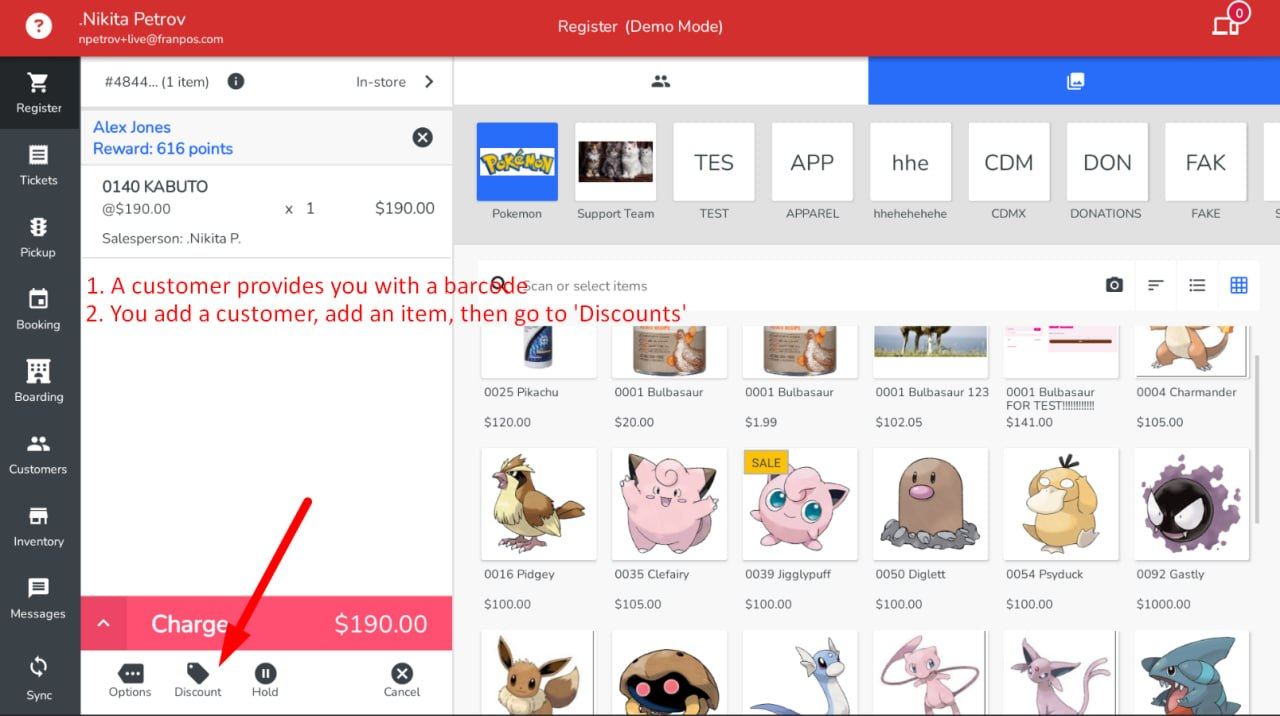
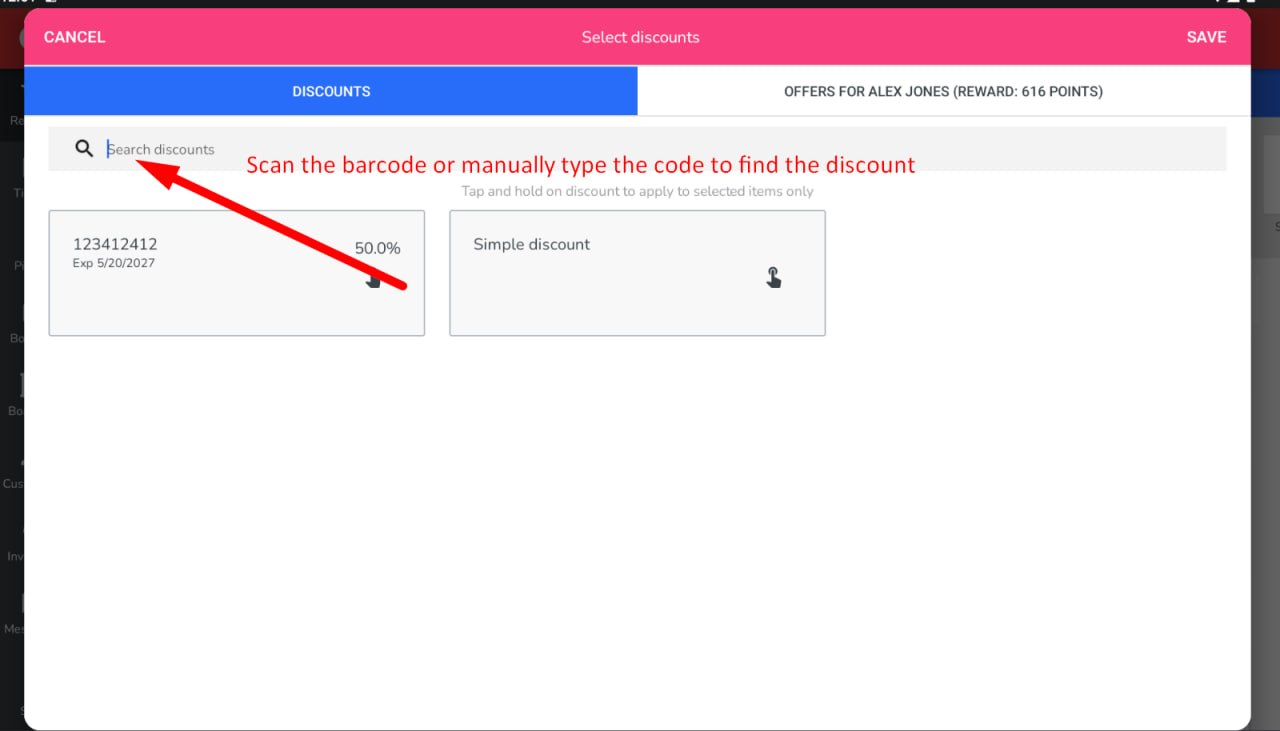
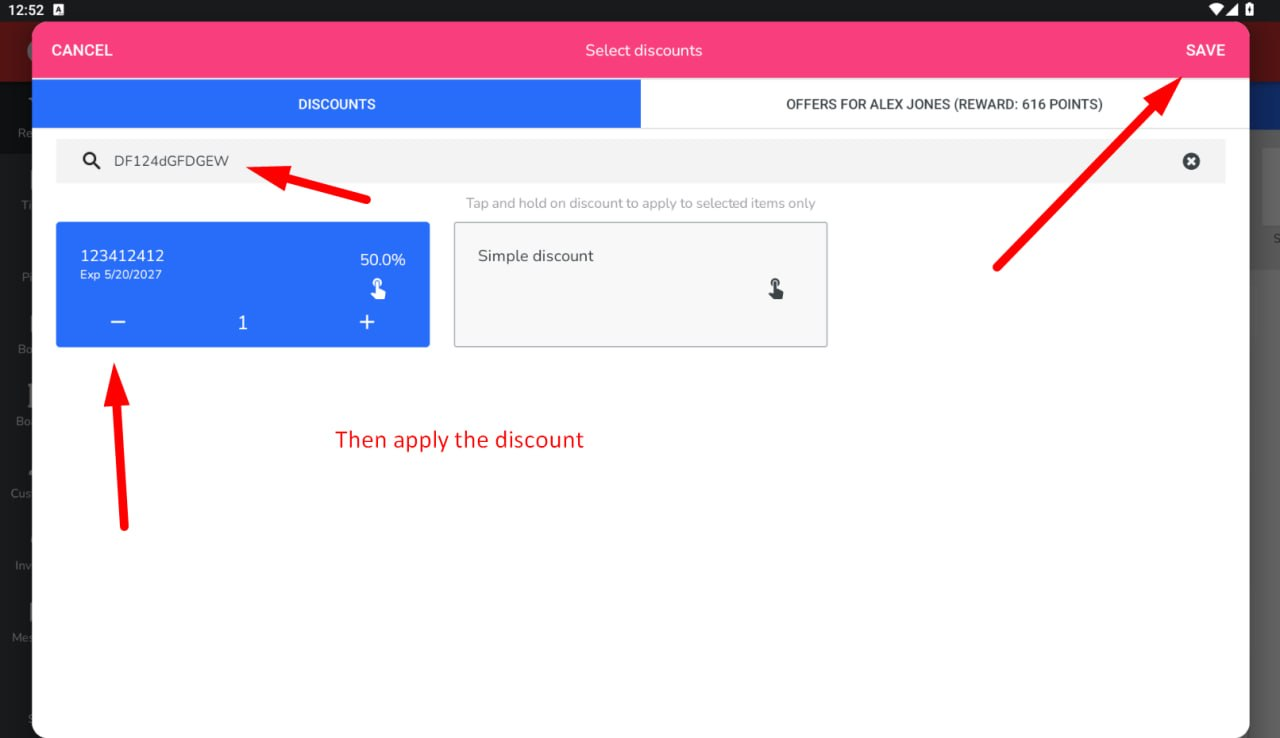
5. When customers receive the coupon, they can show the barcode to an employee. The employee can then go to Discounts in the register, scan the barcode, and find the discount to apply it. Even if the barcode does not scan, the employee will still see the code, which they can enter manually to locate the discount.
Assign a custom discount code that will be used to generate a barcode.
If you want to hide the discount from the register discount list, you can enable the “Use in Automated Marketing” toggle. In this case, employees will not be able to see the discount in the list, but will still be able to apply it by entering the code or scanning the barcode.
2. Once the discount is created, navigate to https://barcode.tec-it.com/en (or any similar website that converts text into barcodes) and use the discount code to generate a barcode. Once the barcode is created, you can download it.
Create a barcode using Code 128 with Minimal width (compatible with the Franpos scanner). Other barcode formats may also be used, but compatibility will depend on your specific scanner model.
3. 3. Adjust your email templates with the coupon by adding a barcode. (Marketing -> Templates -> Open or create a template with a coupon)
Open a template and add an image by dragging it below the coupon.
Eventually, you will have a barcode under your coupon that you can use for marketing. In the future, your employees will be able to scan this barcode from a customer’s phone to find the discount in the register, or simply enter the discount code and apply it.
4. Create a marketing campaign or edit an existing one. Go to Marketing → Campaigns, then open a campaign or create a new one from scratch. On the second page, add a template with a barcode and coupon.
5. When customers receive the coupon, they can show the barcode to an employee. The employee can then go to Discounts in the register, scan the barcode, and find the discount to apply it. Even if the barcode does not scan, the employee will still see the code, which they can enter manually to locate the discount.
Related Articles
Basic Email Campaign (Marketing)
To start with yout first campaign, you need to create an email Template. You can create templates in Back Office Marketing >> Templates. Here 'My Templates' are the ones available only for the selected location, 'Shared Templates' are shared from the ...Automated Marketing/Growth Marketing
With the Growth Marketing add-on, Franpos will allow you to create automated text message and email campaigns that deliver to your customers based on triggers. Prerequisite:- Settings > Account > My plan and billing > Select Automated Marketing ...Reactivation Campaign – Bring Customers Back
? Reactivation Campaign – Bring Customers Back Reconnect with customers who haven’t visited recently but have been active in the past. This automated campaign helps re-engage them with a personal message and a special offer to encourage their ...Automated “Happy Birthday” Campaign
? Automated “Happy Birthday” Campaign Delight your customers and bring them back in with a thoughtful birthday text message that includes a personal note and discount code—sent automatically every day. What it does Sends an SMS X days before each ...Cross-Sell Campaign – First Specific Product/Service Order
?️ Cross-Sell Campaign – First Specific Product/Service Order Automatically promote complementary products or services after a customer’s first purchase of a specific item. Ideal for introducing add-ons, bundles, or upgrades that enhance the initial ...